


2016-up Toyota Tacoma
How to upgrade the stereo system in your Tacoma


In brief: This Crutchfield Research Garage article gives you an overview of your Tacoma's stock stereo system and your aftermarket upgrade options. We'll tell you all about:
- The factory stereo system
- Removing the factory radio
- Removing the factory speakers
- Adding more bass
- Other options for your Tacoma
Then, use our vehicle selector to find the gear that will fit your truck.
Overview of the Toyota Tacoma
There are Toyota Tacomas for fleet and street use, but the Taco’s true heart lies where the pavement ends and the trail begins. Off-roading is just in this truck’s DNA, so while both 2x4 and 4x4 models are fine for commuting, grocery-getting, and other pavement-related tasks, the 4x4 always looks like it's ready to climb a mountain or ford a stream whenever you feel like it.
Available in Access Cab and Double Cab configurations, this mid-sized truck has the size and strength you need to do most of the active-lifestyle things you’d ever want to do and the interior you need to do it in reasonable comfort. It also has some impressive tech and a couple of decent factory stereo options.
But we all know that one of the (many) fun parts of owning a Tacoma is adding the aftermarket gear you need to make it work for you. That includes upgrading the stock stereo gear. Read on to learn more about the process and the possibilities.

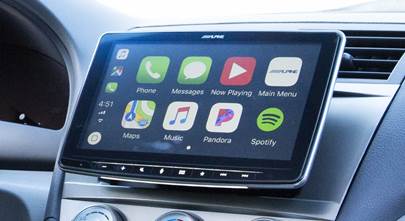
The Tacoma's stock stereos weren't that bad, but you can do better (Crutchfield Research Photo)
The factory stereo systems
The Tacoma can be had with all kinds of cool factory tech, including built-in Qi Wireless charging in some later models. Other nifty tech can include a blind-spot monitor, a backup camera, and even a mounted GoPro holder that’s ready for your action camera.
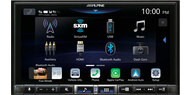
Depending on your truck's model year and equipment package, you'll find a 6", 7", or 8" LCD receiver in the dash. Speaker-wise, there's the standard system or an optional JBL audio system with more speakers for more performance. Again, it’s all very nice, but if you’re looking for something better, aftermarket is the way to go. Single-DIN (2" tall) or double-DIN (4" tall) receivers will fit, and you have lots of great speaker options.

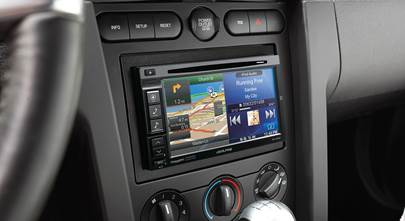
Removing your stock stereo isn't a difficult job and it's well worth the effort (Crutchfield Research Photo)
Replacing the Tacoma's factory radio
Regardless of which receiver you’re dealing with, the removal and replacement process is basically the same in these trucks. You will lose some factory features when you swap out the old receiver (satellite radio, navigation, and an AUX input, most notably), but those can be found in lots of aftermarket stereos, so you’ll be fine.
As for other features, like, say, the backup camera, you can retain those by using the nicely discounted wiring harness adapter included with your Crutchfield stereo purchase. If you have questions about what stays and what goes in what scenario, ask your Crutchfield Advisor.
There are a couple of things to do before you get started. First, hit the “eject” button on the stock receiver to make sure you didn’t leave a favorite CD in there. Next, set the parking brake and disconnect the negative battery cable to prevent any electrical short.
Detailed stereo and speaker removal instructions

With all that taken care of, you’re ready to begin. Use a panel tool to pry off the receiver trim panel by releasing ten retaining clips. Remove the trim panel, then remove the four 10mm screws securing the factory radio. Pull the old radio out, disconnect the harnesses, and set it aside.
To install the new one, secure it to the mounting bracket following the instructions included with that kit, then make your wiring connections following the instructions for the receiver wiring adapter included with your Crutchfield order.
After that, it’s really just a matter of reversing the removal process and securing the new receiver. Be sure to test it out before you finish putting the dash back together.
Tools needed: Panel tool, 10mm socket, ratchet and extension
Read our Car Stereo Buying Guide for shopping tips and advice.
Shop for car stereos that fit your Toyota Tacoma
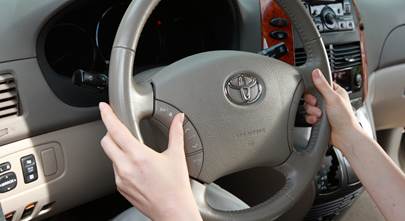
Steering wheel audio controls
In most cases, it's reasonably easy to retain your truck's steering wheel audio controls when you install a new stereo. When you enter your vehicle information, our database will choose the adapter you need to make your factory steering wheel controls work with a compatible aftermarket receiver.

Replacing the stock speakers will really improve your Tacoma's sound (Crutchfield Research Photo)
Replacing the Tacoma's factory speakers
Whether you're replacing the standard or JBL speakers, the work's not too difficult. If you're new to DIY car audio, the Tacoma is a great truck to work on.

Use an index card to protect surfaces when you're removing stock speakers (Crutchfield Research Photo)
Removing the corner dash speakers
Both the base and JBL systems include speakers in the dash corners. They’re just about 2-3/4" in diameter and they’re wired in parallel with the door woofers.
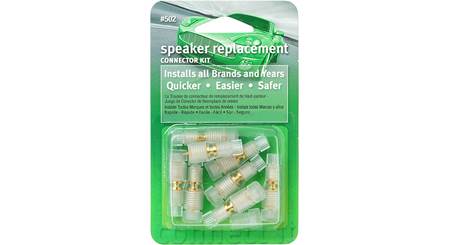
There’s no speaker wiring adapter for the JBL speakers in this location, so you’ll need to splice, solder, or use Posi-Products speaker connectors to connect your new aftermarket tweeters to the factory wiring. You’ll also need to use a set of our universal backstraps to install them.
If you’re replacing JBL speakers, pay attention to impedance. These are low-impedance speakers, so dropping 4-ohm aftermarket tweeters in here will result in lower volume levels. Look for 2-ohm models. Same goes for all the other JBL speakers, by the way. We’ll mention that again, just to make sure it’s front-of-mind when you start shopping.
Tools needed: Panel tool, 10mm socket, ratchet and extension, index card

You'll know the JBL speakers by their distinctive orange surrounds (Crutchfield Research Photo)
Removing the front door speakers
You have plenty of options when it comes to replacing the stock front door speakers. The speaker cavities can handle 6"x9", 6-1/2", or 6-3/4" aftermarket models. In some cases, you’ll need mounting brackets, and if so, Crutchfield will include them with your speaker purchase.
Remember that if you remove or replace the dash tweeters in either stock system, you'll have to splice the input and output wires together to keep the woofers working.
You’ll need to remove the door panels to get to these speakers, and that’s a reasonably simple job that the average DIY-er can handle without too much flop sweat.
Starting at the top edge of the door, pry off the sail panel to release three retaining clips. Remove that panel, then remove one retaining clip from the upper front area of the door panel by pushing in the center pin and prying out the clip. (BTW, if you remove the plastic clips from the sail panel steel and reinstall them onto the sail panel, it'll help with re-installation.)
Next, pry out the screw cover behind the door release and remove one exposed Phillips screw. Remove the felt cover in the door pull cup and remove one exposed Phillips screw from that location. Use your panel tool to pry up the power options switch panel and release two clips, then disconnect the wiring harnesses and remove the panel.
Now you’re hitting the home stretch. Pry out the sides and bottom of the door panel to release nine retaining clips, then disconnect the door lock/release assembly and remove the door panel. With the speaker exposed, all you need to do is remove the four Phillips screws securing the speaker. Get it out of there and start preparing your new speaker for installation by attaching it to the mounting bracket.
Once the new speaker is connected and secured, test it out to make sure it’s working. If it is, and if the windows and door locks are working properly, you can start putting the door back together.
Tools needed: Panel tool, Phillips screwdriver, small flat-blade screwdriver, index card

The Access Cab's rear door speakers are very easy to deal with (Crutchfield Research Photo)
Removing the Tacoma's rear door speakers
Both the Access Cab and the Double Cab Tacomas have speakers in the rear doors. Removal and replacement is pretty easy, but if you’re replacing JBL speakers, remember to pay attention to impedance numbers when you’re shopping.

You can install 6-1/2" or 6-3/4" aftermarket speakers in the Access Cab's rear doors (Crutchfield Research Photo)
Removing the rear speakers in the Access Cab
Your Tacoma Access Cab’s rear doors can comfortably handle either 6-1/2" or 6-3/4" aftermarket speakers. To remove the stock speakers, you’ll start by removing one retaining clip from the top edge of the door panel by pressing in the center pin, then prying out the clip.
Moving down the door, remove the Torx T25 screw inside the door pull cup, then remove the cup. Pry open the screw cover behind the door release and remove the exposed Torx T25 screw. Once that’s done, remove the door release trim.
Next, pry off the lower seat belt anchor cover and remove one 14mm bolt. You can allow the seat belt to hang while you pry out all sides of the door panel to release ten clips and remove the door panel. Remove the three Phillips screws securing the speaker, then pull it out, disconnect it, and set it aside.
From here, just secure the new speaker to the adapter bracket included with your Crutchfield speaker purchase, connect the new speaker’s wiring adapter to the truck’s speaker harness, then secure the whole package in place using the screws you removed above.
Be sure to test the speakers before you button it all up, and please make sure the door releases and seat belts are working properly before you hit the road again.
Tools needed: Panel tool, Phillips screwdriver, small flat blade screwdriver, 14mm socket, ratchet and extension, index card

The Double Cab has bigger doors, but that doesn't mean speaker removal is a bigger job (Crutchfield Research Photo)
Removing the rear speakers in the Double Cab
For the Double Cab, you’ll start at the top edge of the sail panel and pry it off to release three clips. Moving down a bit, remove the retaining clip by pushing in on the center pin and prying out the clip.
Pry out the screw cover behind the door release and remove one exposed Phillips screw, then remove the felt screw cover inside the door pull cup and remove the exposed Phillips screw you find there.
Using your trusty index card to protect the finish, start at the rear edge and pry up the power options switch panel to release two clips. Disconnect the wiring harness and remove the panel. With all that done, you can pry out the sides and bottom of the door panel to release eight retaining clips, disconnect the door lock/release assembly, and remove the door panel.
From here, the speaker removal/replacement process is the same as described above for the Access Cab. All the details for both trucks can be found in the Crutchfield MasterSheet included with your speaker or receiver purchase. You’ll also get the speaker brackets and wiring harness adapters you need.
Tools needed: Panel tool, Phillips screwdriver, small flat blade screwdriver, index card
Read our Car Speakers Buying Guide for more information.
Shop for speakers that fit your Toyota Tacoma

There's plenty of stock bass in Double Cab Tacomas equipped with the JBL system. The sub and amp are housed in this rear wall enclosure. (Crutchfield Research Photo)
More bass in your Tacoma
Double Cab Tacomas equipped with the JBL system include an 8" subwoofer that’s located in the cab wall, behind the rear seats. Removal and replacement isn’t exceptionally difficult, but you will have to get the seats out of your way and remove the cab wall itself. Can you do this? Yes you can, but it’ll take some time, so plan accordingly.
There’s not a ton of space back there, so there’s a somewhat limited selection of 2-ohm aftermarket subs that will fit. The good news is that they’re all pretty impressive and they’ll give you a lot more thump. To see them all, enter your truck’s info and let our database show you what’ll work. You’ll also need an amplifier to power the sub, because the factory amp just doesn't have the juice to satisfy an aftermarket subwoofer.
Overall, the removal/replacement job isn’t that hard, but in many cases, you will have to drill new mounting holes for your new sub. You’re just drilling a hole, but since you’re drilling a hole into your own truck, work carefully, know what you’re drilling into, and always, always wear eye protection.
Tools needed: Panel tool, 10mm socket, ratchet and extension, Torx T-20 driver, drill with 1/8" bit

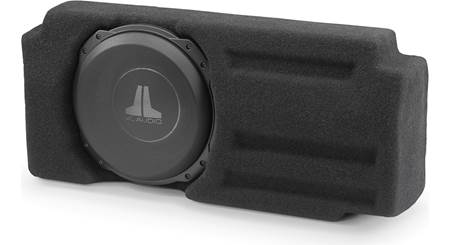
This JL Audio Stealthbox subwoofer is designed to fit your Tacoma Double Cab
Adding a JL Audio Stealthbox to your Tacoma
There’s no room for a standard subwoofer box behind the rear seats of either cab style, but there are other ways to add bass to your Double Cab.
The slickest is the JL Audio Stealthbox enclosure designed for the Tacoma. This custom unit, which installs in the storage pocket behind the passenger-side rear seat, contains a JL Audio 10TW3-D4 subwoofer in a sealed enclosure. It’s wired for 2-ohm mono and can handle up to 400 watts RMS from an external amplifier. A black steel mesh woofer grille is included and a wiring harness is not needed.
Another cool option, especially for an Access Cab Tacoma, is to add a compact powered subwoofer to your truck’s system. These subs produce plenty of thump and the best part is that they’re easy to remove and leave at home when you need space more than bass.
Learn more about building a bass system in our Car Subwoofer Buying Guide.
Shop for vehicle-specific subwoofers for your Toyota Tacoma

Don't let the photo fool you. Custom floor liners from WeatherTech are made to fit your Tacoma.
Other options for your Tacoma
Here are some other ideas to improve and enhance your Tacoma.
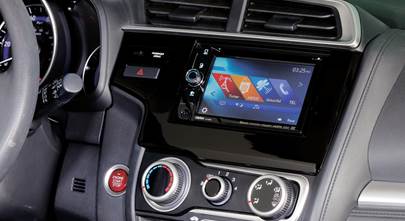
Navigation
A variety of in-dash nav receivers will fit in the Tacoma’s dash, and they’re highly recommended around here. But, depending on how you use your truck, a portable navigation unit could also be a good solution, because you can move it between vehicles as needed, take it on the trail with you, and tuck it into a storage compartment when you're not using it.
Floor mats
Driving a truck eventually leads to helping a friend move and other truck-type things. These activities can take a toll on your Tacoma's carpeting. WeatherTech floor mats and liners will help protect your floors from dirt and damage.
Remote start and security systems
Adding remote start capability to your vehicle lets you warm it up in the winter or cool it down in the summer. The iDatastart system (two are available for this Tacoma) is incredibly convenient and makes it easier than ever to install a remote start system, so we highly recommend it. The module requires a vehicle-specific T-harness (sold separately) to connect with your vehicle's computer, security, and ignition systems, so we ask that you call to order so that we can make sure you get the right harness for your ride.
You can also talk to your Crutchfield Advisor about a security system. They’re not as easy to install (we usually suggest letting a professional do the job), but we can help you choose a system that’ll work in your vehicle.
Let's get started!
Ready to shop? Use our vehicle selector to find the gear that will fit your car or truck. If you have questions, give us a shout via phone, chat, or email


Comments (0)
Please share your thoughts below.