


2013-2018 Toyota RAV4
How to upgrade the stereo system in your RAV4


In brief: This Crutchfield Research Garage article gives you an overview of your RAV4's stock stereo system and your aftermarket upgrade options. We'll tell you all about:
- The factory stereo system
- Removing the factory radio
- Removing the factory speakers
- Adding more bass
- Other options for your RAV4
Then, use our vehicle selector to find the gear that will fit your Toyota.
Overview of the Toyota RAV4
With the fourth-generation RAV4, Toyota nudged its already-popular small SUV all the way into the mainstream. The styling was sleeker, the interiors were nicer, and some of the more, um, eccentric features (cough, side-opening rear hatch, cough) went away. The result was an attractive, capable mini-ute that was more than ready for life in the wilds of suburbia.
The RAV4 isn’t a rock-crawling, stream-fording kind of CUV (crossover utility vehicle), but you already knew that. If you’re like most RAV4 drivers, you use four-wheel drive to stay out of the ditch, not to drive through the ditch for the fun of it. You might not know that the RAV4 has a winning history in rallying, though, so if you’re looking for backwoods bona-fides to brag on, this ute has them.
The RAV4 also has a couple of okay-but-not-great factory stereo systems that really aren’t worth bragging about. Like most Toyotas, the RAV4 is designed to run forever or until the sun explodes, whichever comes first, so upgrading the stereo will make all those miles a lot more enjoyable.

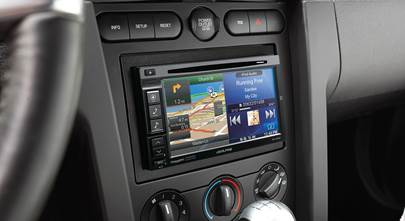
Replacing your RAV4's stock radio isn't hard and you can really improve both sound and functionality with the right aftermarket stereo (Crutchfield Research Photo)
The factory stereo system
The base 6-speaker system centered on an AM/FM/CD receiver with MP3 and WMA capability. The optional JBL Audio system featured eleven speakers and an AM/FM/SiriusXM/HD/CD/MP3/navigation receiver.
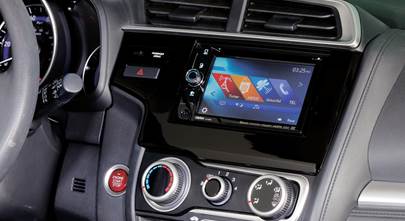
When you replace the factory radio, you'll lose the factory AUX and USB input connections, plus the factory nav, if so equipped. We’ll make sure you get the wiring harness adapter you need to retain other features (like the stock cameras) when you install an aftermarket receiver. We’ll even give you a nice discount on the adapter, plus the dash kit you’ll need to install your new single-DIN (2" tall) or double-DIN (4" tall) receiver.
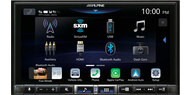
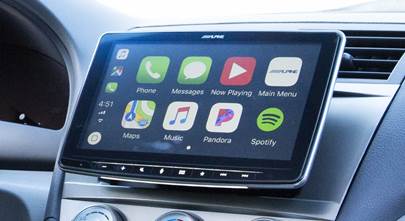
Upgrading the receiver isn’t just about sound. With select receivers, you can bring Apple CarPlay and Android Auto functionality to your RAV4. If your phone is a big part of your life, that’ll be a big upgrade indeed.

Be sure to put a clean cloth underneath the clock/hazard switch assembly to protect the dash (Crutchfield Research Photo)
Removing the factory radio
Removing either of the stock radios is a reasonably easy process. Before you start, make sure you don’t have any favorite CDs in the slot, then set the parking brake and disconnect the negative battery cable to prevent any electrical short. Safety first, y’know.
Once you and your RAV4 are safe and secure, start at the driver’s side and use a panel tool to pry off the dash trim strip. Next, pry out the clock/hazard switch assembly to release the retaining clips, then put the assembly on the dash. Make sure to put a clean shop cloth under it to protect the dash.
Detailed stereo and speaker removal instructions

Pry out both receiver side vents to release four clips on each vent, then remove the vents. Remove the four 10mm screws securing the receiver to the dash, then disconnect the harnesses and remove the receiver.
Your dash kit and and wiring harness will include their own instructions, so follow those to get the new receiver installed. Once it’s hooked up, test it out and make sure it’s working. If it is, you’re ready to put the dash back together.
Tools needed: Panel tool, 10mm socket, ratchet and extension
Read our Car Stereo Buying Guide for shopping tips and advice.
Shop for car stereos that fit your Toyota RAV4
Steering wheel audio controls
In most cases, it's reasonably easy to retain your Toyota's steering wheel audio controls when you install a new stereo. When you enter your vehicle information, our database will choose the adapter you need to make your factory steering wheel controls work with a compatible aftermarket receiver.

You'll need to drill out some rivets to remove your RAV4's stock speakers. (Crutchfield Research Photo)
Removing the factory speakers
Even if you don't want to replace the stock stereo, you can still get a serious audio improvement by installing a new set of speakers. We still recommend replacing the stereo, though!
Dash tweeters
The stock dash tweeters are 3-1/2" models that are wired together at each tweeter location. If you remove the tweeters, you'll need to splice the input and output wires together to keep the woofers working. We recommend simply replacing both with a set of aftermarket component speakers.
To remove the stock tweeters, you’ll start at the rear edge and pry up the speaker grille to release four clips. Pull the grille toward rear of vehicle to remove it, then remove the two 10mm screws securing the speaker. Pull out the old speaker, disconnect it, and set it aside.
There’s no speaker wiring adapter that works with JBL-equipped RAV4's, so for those, we recommend using a set of Posi-Products connectors to connect the new tweeters to the factory wiring. You can also splice or solder, of course. Once that’s all done, you’re ready to install the new tweeters.
Tools needed: Panel tool, 10mm socket, ratchet and extension

Replacing the stock speakers starts with removing the door panels (Crutchfield Research Photo)
Front door speakers
The stock 6-3/4" front door speakers can be replaced by a healthy assortment of aftermarket models. You’ll need a speaker mounting bracket to install most of them, and we’ll include it and the wiring adapter you’ll need with your Crutchfield speaker purchase.
The stock speakers are each secured by three rivets, and you’ll need to drill those out with a power drill and a 3/16" bit, then use a 1/8" bit to drill new mounting holes that line up with the mounting bracket holes. This isn’t all that challenging if you’re even slightly familiar with basic hand tools, but it’s important to work carefully, be aware of the area you’re drilling into, and wear eye protection.
Complete disassembly instructions can be found in your Crutchfield MasterSheet, and if you have questions during your installation, remember that your Crutchfield purchase also includes free tech support for the life of your gear.
Once the speakers are installed, test them out and make sure they’re working. Before you start reinstalling the doors, be sure to make sure the wiring isn’t interfering with the windows, and also check the doors and locks to make sure they’re okay. If so, you’re good to go.
Tools needed: Panel tool, Phillips screwdriver, drill with 1/8" & 3/16" bits

The factory JBL speakers are distinguished by better sound and these bright orange surrounds (Crutchfield Research Photo)
Rear door speakers
We hate to repeat ourselves, but removing and replacing the rear door speakers will seem awfully familiar to anyone who’s removed and replaced the front door speakers. To wit:
The stock 6-3/4" front rear door speakers can be replaced by a healthy assortment of aftermarket models. You’ll need a speaker mounting bracket to install most of them, and we’ll include it and the wiring adapter you’ll need with your Crutchfield speaker purchase.
The stock speakers each secured by three rivets, and you’ll need to drill those out with a power drill and a 3/16" bit, then use a 1/8" bit to drill new mounting holes that line up with the mounting bracket holes. This isn’t all that challenging if you’re even slightly familiar with basic hand tools, but it’s important to work carefully, be aware of the area you’re drilling into, and wear eye protection.
Complete disassembly instructions can be found in your Crutchfield MasterSheet, and if you have questions during your installation, remember that your Crutchfield purchase also includes free tech support for the life of your gear.
Once the speakers are installed, test them out and make sure they’re working. Before you start reinstalling the doors, be sure to make sure the wiring isn’t interfering with the windows, and also check the doors and locks to make sure they’re okay. If so, you’re good to go.
See? Told ya. Hey, imagine how good you’ll be at this whole speaker removal thing by the time you get to speaker #4!
Seriously, though, installing new front and rear door speakers is a great project for the car audio DIY-er. You’ll be glad you did the work when you hear how much better your music sounds.
Tools needed: Panel tool, Phillips screwdriver, drill with 1/8" & 3/16" bits

Replacing the 8" JBL subwoofer in 2013-15 models is pretty easy once you get to it, but getting to it isn't so easy. Same goes for the 2016-18 RAV4 sub, which is on the passenger's side. (Crutchfield Research Photo)
Rear side subwoofer
If you have a RAV4 with the JBL system, there’s an 8" subwoofer in the rear cargo area. If it’s a 2013-2015 model, the sub is on the driver’s side. For the 2016-2018 models, Toyota moved it to the passenger’s side.

Like we said, getting to the sub isn't easy.... (Crutchfield Research Photo)
The sub removal process isn’t exactly hard in either case, but there are a lot of steps involved. This is a do-able DIY project, but it’s important to be patient, stay organized, and work carefully. The sound improvement will be worth the work, but just bear in mind that it’s a lot of work. Complete, illustrated instructions can be found in your Crutchfield MasterSheet.
Tools needed: Panel tool, Phillips screwdriver, 10mm & 14mm socket, ratchet and extension
Read our Car Speakers Buying Guide for more information.
Shop for speakers that fit your Toyota RAV4
Hybrid note
A hybrid's gas-electric hybrid powertrain makes replacing the stereo a little more complicated. As you might expect, the hybrid RAV4 contains some very sensitive electronics, so here are a couple of things to keep in mind:
- Be sure to only use a multi-meter when testing wires, and NEVER use a test light to test wires in this vehicle. Doing so could cause some serious (by which we mean dangerous and expensive) damage.
- A hybrid is not the car to choose if you want to build a massively powerful audio system. The thirsty current draw of a high-powered stereo is not a good thing for the hybrid system, so don't exceed a 30-amp current draw or 350-watt RMS power rating.
More bass in your RAV4
The spacious cargo area is one of the main reasons people buy RAV4s in the first place. It’s kind of amazing how much stuff can be crammed into the back of this compact ute, and that includes fun stuff like subwoofer boxes.
If you’re all about bass, there’s a 43" W x 18" H x 18"/32" D space available with the cargo cover in place and the rear seat fully reclined. Obviously, there’s more if you’re not planning on hauling anything but subwoofers, but that’s obviously not most people.
If you want more bass, but don’t want to give up everyday practicality, you can always enhance your bass with a powered subwoofer.
Learn more about building a bass system in our Car Subwoofer Buying Guide.

A set of WeatherTech floor liners will protect your RAV4's carpets from dirt and damage. And yes, this is a stock photo. Your liners will be custom-made to fit your RAV4.
Other options for your RAV4
Here are some other ways to upgrade your Toyota RAV4.
Floor mats to protect your carpet
No matter how much you pamper your RAV4, you're eventually going to get involved in some sort of truck-like activity that gets you and/or it dirty. When that happens, it's a good idea to have a set of WeatherTech liners on the floors and especially in the cargo area. These incredibly durable mats trap moisture, contain dirt, and keep your factory carpets looking good. To see all the mats that fit your truck, enter your vehicle info.
Sound damping to block noise
As vehicles age, creaks and groans can start to intrude on your driving serenity. A Dynamat Xtreme Door Kit is the perfect way to seal in sound. This heavy-duty insulating material is easy to install, and it really makes a difference. One kit will take care of the front doors in your RAV4. The rear doors and the rear hatch are also good areas to target if you build a serious sound system.
Add an amplifier (or two) for better sound
A new amplifier will help you get the most out of your new speakers. You'll get cleaner power (and a lot more of it), which will result in much, much better sound. A 4-channel amp will help your new speakers deliver crystal-clear details in your music, and a mono amp can provide the juice your subwoofer needs to pump out the bass. Learn more about adding amps to your system in our Car Amplifier Buying Guide.
Security systems to protect your stuff
Installing a security system in your RAV4 isn't easy (security systems rarely are), but it's less complicated than it could be. Our Crutchfield Advisors can help figure out what you need to get the job done, but we usually recommend taking your car and your new security gear to a professional installer.
Let's get started!
Ready to shop? Use our vehicle selector to find the gear that will fit your car or truck. If you have questions, give us a shout via phone, chat, or email
Comments (5)
Please share your thoughts below.


Edwin from NE Kansas
Posted on 6/1/2023
Does the 2014 RAV4 base head unit have bass rolloff as the volume increases? If so, do you have a wiring harness that plugs into the rear of the base factory head unit to ease installment of aftermarket amplifier?
Jon Paul from Crutchfield
on 6/2/2023
Allen from Atlanta
Posted on 6/27/2022
One item that isn't in your article is that it appears that a iDatalink-ready stereo is required to retain the vehicle personalization settings menu capability. Or is there another option to retain/access/control vehicle personalization?
Jon Paul from Crutchfield
on 6/27/2022
Justin from Atlanta
Posted on 7/1/2021
Do you know the RMS wattage for the non-JBL factory stereo in the 2018 Rav4? Thanks!
Jon Paul from Crutchfield
on 7/2/2021
Ray from Virginia Beach
Posted on 1/2/2021
I'm really interested in upgrading my 2015 rav4 to a stereo with CarPlay. I'm curious, will buying the recommended harness allow me to use the factory microphone with the aftermarket radio? I'm not really a fan of the aftermarket microphones, not that they don't work well, just they detract from the overall aesthetics of the interior of the vehicle in my opinion. Is this an option, or am I just wishing?
Jon Paul from Crutchfield
on 1/4/2021
Erich Marusich from EL PASO
Posted on 9/22/2020
Your installation pictures and explanation are vague. What should be done with the dash tweeters? How are they installed? Brackets or metra ?
Jon Paul from Crutchfield
on 9/23/2020