


2011-2022 Jeep Grand Cherokee
How to upgrade the stereo system in your Grand Cherokee


In brief: This Crutchfield Research Garage article gives you an overview of your Grand Cherokee's stock stereo system and your aftermarket upgrade options. We'll tell you all about:
- The factory stereo system
- Removing the factory radio
- Removing the factory speakers
- Adding more bass
- Other options for your Grand Cherokee
Then, use our vehicle selector to find the gear that will fit your vehicle.
Overview of the Jeep Grand Cherokee
Most vehicles don’t stay in production as long as the fourth-generation Jeep Grand Cherokee, which is a testament both to the quality of the original design and the loyalty of Jeep owners. Even after the debut of the all-new WL model, the outgoing WK2 was still sold as the 2022 “Grand Cherokee WK.” Just can’t keep a good SUV down, it seems.
And this is a good SUV. Maybe even a grand one. It’s big, roomy, nice-looking, and hey, it’s a Jeep, so when properly equipped, it’ll go pretty much anywhere it fits. The Grand Cherokee was available in trim levels to suit almost any budget and interest, and so were the factory stereos.
Some of those stereos were more high-performance than others, but any of them can be improved upon with new aftermarket gear. Read on to learn what you can do and get some tips on how it’s done.

There were several different factory radios. This is a 2011 base model. (Crutchfield Research Photo)
The factory stereo system
Jeep kept the Grand Cherokee interesting by updating and improving it over the years. As part of that effort, the stereo systems changed quite a bit. There was always a base system, of course, and optional Alpine and Harman Kardon systems were also available. A nav receiver was available throughout, with a screen that eventually grew to 8.4" in size.
When you replace the factory radio in a Grand Cherokee, you'll lose some factory features. What you lose depends on the model year and the factory features that are present to begin with. And, at the risk of being a bit too obvious, when you replace the factory navigation radio, you won’t have the factory navigation system anymore. This isn’t necessarily a bad thing.
There’s more, of course, but all that matters to you is what’s relevant to your Grand Cherokee. To learn more about which receivers will work, enter your vehicle information. Our database will show you all the stereos that fit, plus our Research Team’s detailed information on what you need to know when you replace the stock radio. Pay close attention to that info because it'll really help with your shopping process.
Detailed stereo and speaker removal instructions

Some Grand Cherokees are equipped with an active noise cancellation system, so when you add an aftermarket amplifier, processor, or subwoofer, you'll need to disable that system. To do so, you’ll need to get to the factory amp, which is located under the driver's side cargo floor panel. Just remove the cargo floor panel, the hatch door scuff plate, the storage compartment, and the spare tire trim.
In some models, when you use the included wiring adapter with the factory amplifier, you'll lose front-to-rear fade control. In others, if you’re going to bypass the factory amp, we recommend replacing the low-impedance factory speakers with standard 4-ohm aftermarket speakers to prevent overheating and other damage to the new radio. You can also add an aftermarket amp, of course, and we’ll be happy to help you choose one.
With later Harman Kardon systems, if you're disconnecting speakers from the factory audio system to add an amp or line output converter, you'll need to use load resistors on those channels to keep your system working. If you're just tapping into speaker wires to add a mono amp, you won't need the load resistors.
Use our vehicle selector to find the gear that will fit your Grand Cherokee. If you have questions about this or anything else involved in your audio upgrade project, give us a shout via phone or chat. And remember that your Crutchfield stereo purchase includes free tech support for the life of the gear.

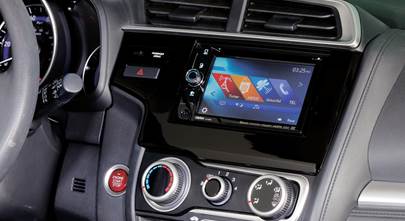
Here's a look at the 2014 LCD screen radio (Crutchfield Research Photo)
Removing the factory radio
Radio removal isn’t all that hard in any of these Jeeps, but there are some differences between the pre- and post- 2014 models. There are some things to pay attention to when you’re ordering or installing a new stereo, too.
When you order that new stereo from Crutchfield, we’ll give you a nice discount on the dash kit and wiring harness adapter needed to install it. Do note that certain kits and adapters won’t work in Trackhawk or SRT Grand Cherokees.
Before you start working, set the parking brake and disconnect the negative battery cable to prevent any electrical shorts.

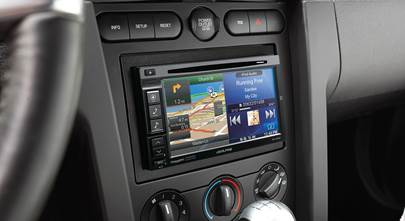
The 2011 premium radio fits into a smoothed-out dash design (Crutchfield Research Photo)
Radio removal in 2011-2013 Grand Cherokees
For these model years, the radio removal process is the same for the base and the navigation receivers. Starting at the bottom edge, use a panel tool to pry out the receiver trim panel retaining clips, then disconnect the harnesses and remove the trim panel. Remove the four 7mm screws securing the receiver to the dash, then disconnect those harnesses and remove the receiver.
The difference is that you won't need an installation kit to install a new receiver when you’re replacing the base receiver. If you’re replacing the navigation receiver with a double-DIN (4" tall) model, you’ll need to modify your Jeep's sub-dash to create a bit more space. The receiver mounting bracket package includes a helpful illustration for this relatively minor mod.
Tools needed: Panel tool, 7mm socket, ratchet and extension

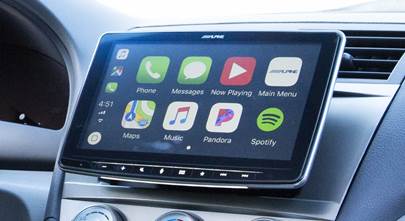
This 2017 Grand Cherokee has the Harman Kardon stereo system and the 8.4" nav receiver (Crutchfield Research Photo)
Radio removal in 2014-up Grand Cherokees
For the base radio, you’ll start by opening the dash storage door. Next, pry off the receiver trim panel to release fourteen retaining clips, then disconnect the harness and remove the trim panel. From here, all you need to do is remove the four 7mm screws securing the receiver to dash, then disconnect the harnesses and remove the old receiver.
There’s a module behind the factory radio that restricts the cavity depth. You’ll need to relocate it in order to obtain the 1.645" of extra depth you’ll need for your new radio.
If your 2014-up Jeep has the 8.4" LCD receiver, the removal process is the same, but you’ll need some extra gear to retain all the factory functionality built into the receiver unit. These interfaces are not free, but you'll appreciate the discount.
Tools needed: Panel tool, 7mm socket, ratchet and extension
Read our Car Stereo Buying Guide for shopping tips and advice.
Shop for car stereos that fit your Jeep Grand CherokeeSteering wheel audio controls
It's relatively easy to retain your Grand Cherokee's steering wheel audio controls when you install a new stereo. When you enter your vehicle information, our database will choose the adapter you need to make your factory steering wheel controls work with your new receiver.

Replacing the speakers will improve your Jeep's sound, even if you keep the stock radio (Crutchfield Research Photo)
Removing the factory speakers
The factory radios varied quite a bit over the life of this vehicle, but the stock speakers stayed in the same locations. Some of them are easy to deal with, while others can be a bit more challenging. We’ll discuss it all below.

Some factory systems include a center dash speaker (Crutchfield Research Photo)
Removing the center dash speaker
The center dash speaker, found in mid- and upper-level systems, is a 3-1/2" model that can be replaced by a variety of same-size aftermarket models. It’s easy to reach and replace, too.
Use a panel tool to pry up the defroster vent/grille panel and release the retaining clips, then disconnect the wiring harness and remove the trim panel. Next, remove the two 7mm screws securing the speaker, then pull it out, disconnect it, and remove it.
Once you’ve connected the new speaker’s wiring adapter to the vehicle’s speaker harness, you can secure the speaker with the screws you removed earlier. Once you’ve tested the speaker, you can replace the factory grille.
Tools needed: Panel tool, 7mm socket, ratchet and extension

You'll need to remove the door panels to replace the woofers and (if present) midrange speakers (Crutchfield Research Photo)
Removing the front door speakers
Depending on which factory stereo system is in your Grand Cherokee, the door speaker array will consist of 6"x9" woofers/speakers, 1.452" tweeters, and in some cases, 3-1/2" midrange speakers.
You’ll need to remove some panels to get to these speakers, which is a reasonably easy process. Use your panel tool to pry out the screw cover behind the door release, then remove one Phillips screw. Next, pry open the screw cover inside the door pull cup and remove one 7mm screw.
Pry up the power options switch panel to release the retaining clips, then disconnect the wiring harness and remove the switch panel. Pry out the sides and bottom of the door panel to release fifteen clips, then reach behind it to disconnect the wiring harness before lifting the panel up and out of the window channel. Store the panel someplace clean and dry while you keep working.
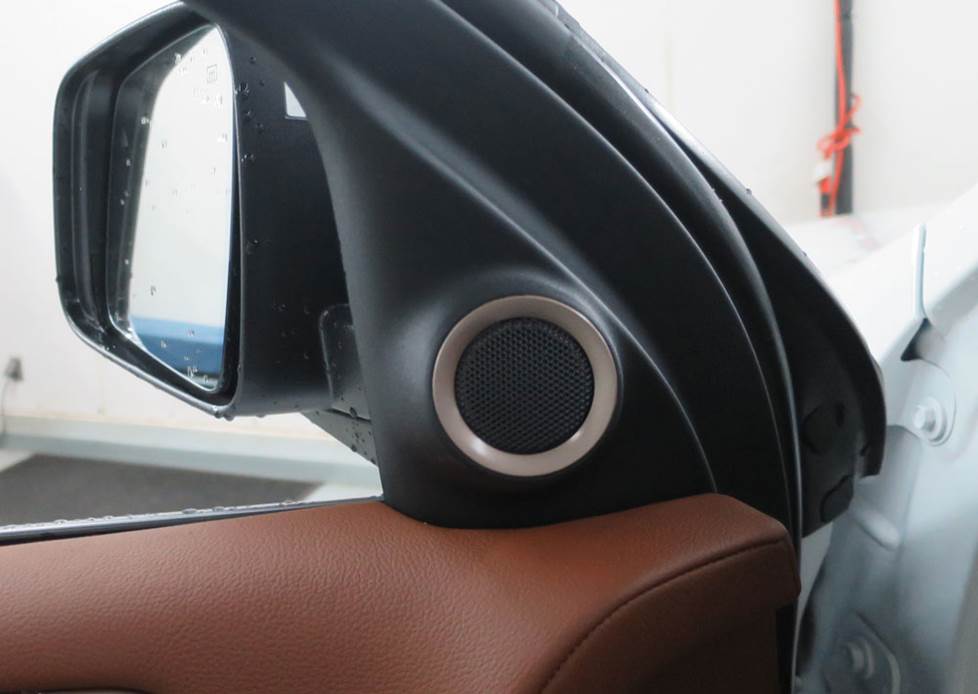
The sail panel tweeters are quite easy to reach and remove (Crutchfield Research Photo)
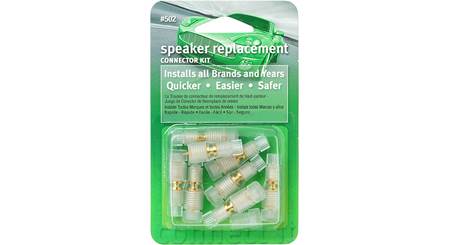
Tweeters: The factory tweeter is mounted to the back of the sail panel. There’s no mounting bracket available for this speaker location, so you’ll need to use hot glue, silicone, or our universal backstraps to secure your new tweeters. There’s no wiring harness adapter either, so you’ll need to splice, solder, or use Posi-Products speaker connectors to connect the tweeters to the factory wiring.
To remove the stock tweeter, pry out one clip at the bottom of the sail panel, then pull out the window trim panel enough to access the tweeter location. Pry out the three tabs securing the tweeter to the grille, then disconnect it and remove it.

The midrange speakers are attached to the door panels (Crutchfield Research Photo)
Midranges: To remove the midrange speaker, remove the two Phillips screws securing it, then pull it out and remove it. There is a wiring harness adapter for this location, so just connect that to the vehicle’s speaker harness.

The lower speakers can be replaced by same-size, 6-1/2", or 5-1/4" aftermarket models (Crutchfield Research Photo)
Woofers/full-range speakers: The lower speakers are secured to a factory bracket by four Torx T-20 screws. Remove those, then disconnect the speaker wiring harness and remove the old speaker. There is a wiring harness adapter for this location, so connect that to the vehicle’s speaker harness.
The 6”x9” stock speakers can be replaced by a variety of same-size, 5-1/4", or 6-1/2" aftermarket speakers. You’ll need brackets for the smaller ones, and we’ll include them free with your Crutchfield speaker purchase.
Once the new speakers are secured, test them to make sure they’re working. If they are, start putting the door back together by reversing the removal steps.
Tools needed: Panel tool, Phillips screwdriver, small flat blade screwdriver, 7mm socket, ratchet and extension, Torx T-20 driver

The rear speakers can also be accessed by removing the door panels (Crutchfield Research Photo)
Removing the rear door speakers
The rear doors contain 6-3/4" full-range speakers in most cases, while the Harman Kardon systems have 6-3/4" woofers and 1.483" tweeters. The lower speakers can be replaced by same-size, 5-1/4", or 6-1/2" aftermarket models.
As for the tweeters, there are separates available and a variety of component systems that can replace both the woofer and the tweeter.There’s no mounting bracket available for the tweeter location, so you’ll need hot glue, silicone, or our universal backstraps. There’s no wiring harness adapter either, so you’ll need to splice, solder, or use some more Posi-Products speaker connectors.
If you replace the lower speakers with smaller aftermarket models, the mounting brackets you’ll need will be included with your Crutchfield speaker purchase. You’ll also need to cut off the upper locator tab for a flush fit. If you’re installing an aftermarket 6-3/4" speaker, you’ll need to drill four new screw holes. That’s not hard to do, but know what you’re drilling into, work carefully, and wear eye protection.
You’ll need to remove the door panels to get to these speakers. The big ones are attached to the door itself, while the HK-only tweeters are mounted on the door panels and will need to be (gently) pried out.
The door panel removal process is quite similar to what goes on with the front doors, so if you can do that, you can do this. All the details can be found in the Crutchfield disassembly instructions included free with your car audio purchase.
Once your new speakers are secure, test them to make sure they’re working. If they are, you can start putting the doors back together. Be sure to check the door lock/release operation and make sure there aren’t any wires interfering with the windows.
Tools needed: Panel tool, Phillips screwdriver, small flat blade screwdriver, 7mm socket, ratchet and extension, Torx T-20 driver

Removing and replacing the rear pillar speakers is gonna take some work (Crutchfield Research Photo)
Removing the rear pillar speakers
The rear pillar speakers found in most Grand Cherokees measure 2.530" in diameter, and there are aftermarket replacements available.
Getting to these speakers is not the work of a moment. There are a lot of disassembly steps involved, and while none of those steps are insanely complicated, there’s just…a lot of them. You can do this, but you’ll want to carve out some time for the project. Work carefully, stay patient, and above all else, stay organized. All the instructions for all the steps can be found in your Crutchfield disassembly instructions.
The good news is that doing this project gets you most of the way to accessing the rear subwoofer. For obvious reasons, we’d suggest upgrading both at the same time.
Tools needed: Panel tool, 7mm & 10mm socket, ratchet and extension, Phillips screwdriver

By the time you do all the work needed to reach the pillar speakers, you might as well replace the sub, too. (Crutchfield Research Photo)
Removing the rear side subwoofer
As noted above, getting to the 8" factory subwoofer takes some time. There are all the steps involved in getting to the rear pillar speakers, plus a few more. Again, it’s not a hard thing to do, but you’ll be doing a lot of stuff for a long time.
The sub is housed in an enclosure tucked into the passenger’s side of the rear cargo area. You’ll remove the enclosure, then remove the sub from the enclosure. You'll re-use the factory enclosure when you install your new subwoofer, so be gentle with it while you’re doing all this.
Depending on the aftermarket subwoofer you choose (and there are several to choose from), you may have to drill new mounting screw holes or fabricate a speaker bracket. That’s not the hardest thing in the world, but know what you’re drilling into, work carefully, and wear eye protection.
Tools needed: Panel tool, 7mm & 10mm (deep socket) sockets, ratchet and extension, #2 and #3 Phillips screwdrivers, Torx T-25 driver
Read our Car Speakers Buying Guide for more information.
Shop for speakers that fit your Jeep Grand Cherokee

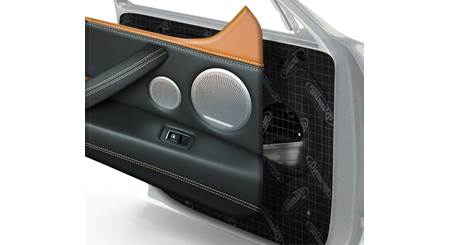
This JL Audio Stealthbox is made to fit your Grand Cherokee
More bass in your Grand Cherokee
If you want to take the maximalist approach to bass performance, the Grand Cherokee gives you plenty of room for a subwoofer box. With a 41"W x 15"H x 37"/35" D space, you can go big if you want to. If you want better bass, but still need room for cargo and groceries, you can go with a more compact powered subwoofer.
Another option is replacing the stock sub with a JL Audio Stealthbox. This custom-fit sub enclosure contains one 10" JL audio subwoofer with a 2-ohm impedance and fits right into the rear cargo panel. This is not a powered sub, so you'll also need an aftermarket amplifier.
Learn more about building a bass system in our Car Subwoofer Buying Guide.
Shop for vehicle-specific subwoofers for your Jeep Grand Cherokee

Protect your Jeep's carpeting with a set of WeatherTech floor and cargo liners
Other options for your Grand Cherokee
Here are some suggestions on how to make your Jeep even better.
Add an amplifier
In a utility-style vehicle like this one, you need clean power (and lots of it) going to your speakers and sub. A new amplifier will give you the "headroom" you need to get the sound you want at highway speeds.
Protect the carpeting
If you're using your Jeep as intended, it's probably going to get dirty every now and then. Keeping it in great shape really helps retain resale value, so protect your carpets (and your investment) with a set of custom-fit WeatherTech floor liners.
Remote start and security systems
Adding remote start capability to your Grand Cherokee lets you warm it up in the winter or cool it down in the summer. The iDatastart system is incredibly convenient and makes it easier than ever to install a remote start system, so we highly recommend it. We ask that you call to order so that we can make sure you get the right harness for your ride.
You can also talk to your Crutchfield Advisor about a security system. They’re not as easy to install (we usually suggest letting a professional do the job), but we can help you choose a system that’ll work in your vehicle.
Let's get started!
Ready to shop? Use our vehicle selector to find the gear that will fit your car or truck. If you have questions of your own, give us a shout via phone or chat.


Comments (0)
Please share your thoughts below.