


2010-up Toyota 4Runner
How to upgrade the stereo system in your 4Runner


In brief: This Crutchfield Research Garage article gives you an overview of your 4Runner's stock stereo system and your aftermarket upgrade options. We'll tell you all about:
- The factory stereo system
- Removing the factory radio
- Removing the factory speakers
- Adding more bass
- Other options for your 4Runner
Then, use our vehicle selector to find the gear that will fit your Toyota.
Overview of the Toyota 4Runner
When the original Toyota 4Runner made its North American debut back in 1984, the funny-looking name drew almost as much attention as the thoroughly competent truck it was attached to. “THAT’S NOT A WORD!” cried the people who always say that sort of thing, before presumably hopping into their MG MGB GT’s and driving home in a haze of oil smoke.
Since then, the 4Runner has made a name for itself by being rugged, reliable, versatile, and fun. Tough enough for weekend adventures, yet comfortable enough for weekday errand-running, this fifth-generation 4Runner is the kind of truck you can enjoy for years. And, since it’s a Toyota, you probably will.

This looks worse than it is. Replacing the receiver really isn't that hard in these trucks (Crutchfield Research Photo)
The factory stereo system
The 4Runner’s stereos weren’t all that bad as factory systems go. The base receiver was an AM/FM/CD model with built-in XM satellite radio and 8 speakers. The early-edition top-line model was an AM/FM/MP3 unit with XM, 4-CD capability, and navigation. The JBL system included a subwoofer, too. In 2014, Toyota added the “Entune” audio system, which included a 6.1” high-res screen, HD Radio™ tuner, a backup camera, and some other goodies.
When you replace the stock receiver, you’ll lose fun features like the XM satellite radio, and the aux input, but those can be replaced (upgraded, even) with a new receiver. The backup camera, which displays in the rear-view mirror, can be retained when you install a new receiver.
Overall, the receiver removal and replacement process is pretty straightforward, but if you have questions, our Crutchfield Advisors are here to answer them when you’re choosing your new stereo.
Party Mode: Tailgating is just one of the many fun things you can do in a 4Runner, and it’s especially fun in 2010-2013 models, thanks to the “Party Mode” switch. This nifty little switch, found just to the right of the key, lets you send power that would ordinarily go to the rear door speakers all the way back to the cargo door speakers, so you can pop the hatch and enjoy some tunes while you’re doing your pre-game thing. It also works when you’re underway, of course, and it will still work when you replace your 4Runner’s stock stereo. We’ve done a bit of research on this (More mode than party, alas…), so if you have questions, give us a call.
Detailed installation instructions

Removing the factory radio
No matter which 4Runner radio you’re replacing, the job will be very DIY-friendly. You’ll need some basic tools and a bit of time, but with the discounted dash kit and wiring harness adapter, and your free Crutchfield MasterSheet instructions, you can do the job yourself. Your Crutchfield stereo purchase also includes free tech support for the life of your gear, so if you run into trouble, you can give us a call and get the help you need.
Before you start, there are a few things you’ll need to do. First, hit the “eject” button and make sure your favorite CD’s not still in the deck. We hate when that happens. Next (and this is important), set the parking brake and disconnect the negative battery cable to prevent any electrical short. With all that done, you can get to work.

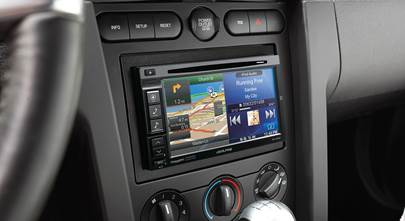
The base receiver does a competent job, but an aftermarket model will give you a lot more functionality and performance (Crutchfield Research Photo)
Removing the non-nav receiver
For the base receiver, you’ll start by using a panel tool to pry out the climate control panel, which is held in place by eight retaining clips. Disconnect the wiring harnesses and remove the panel, then remove the four 10mm screws exposed by the removal of the climate control panel. Pull out the factory radio/vent assembly to release six clips, then disconnect and remove the old radio.

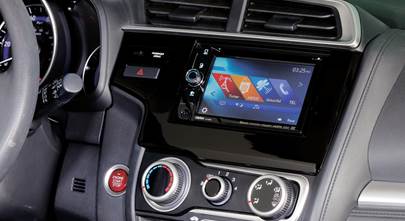
The 4Runner's navigation receiver is easy to remove and replace (Crutchfield Research Photo)
Removing the navigation receiver
For this receiver, start by prying off the lower dash side trim panels to release five clips on each panel. Remove both panels, then pry out the climate control panel to release four clips. Disconnect the wiring harness and remove the control panel, then remove the four 10mm bolts exposed when you removed the panel. Next, pry out the factory radio/vent assembly to release six clips and remove the assembly.
Now you’re ready to install your new receiver. When you buy your receiver at Crutchfield, we’ll give you a very nifty discount on the stereo mounting bracket and wiring harness adapter you’ll need to make it all work. Follow the instructions included with each, then slide the new receiver into the dash cavity and secure it. Test to make sure it’s working, and if it is, start putting the dash back together.
Tools needed (both): Panel tool, 10mm socket, ratchet and extension
Read our Car Stereo Buying Guide for shopping tips and advice.
Shop for car stereos that fit your Toyota 4Runner
Steering wheel audio controls
In most cases, it's reasonably easy to retain your 4Runner's steering wheel audio controls when you install a new stereo. When you enter your vehicle information, our database will choose the adapter you need to make your factory steering wheel controls work with a compatible aftermarket receiver.

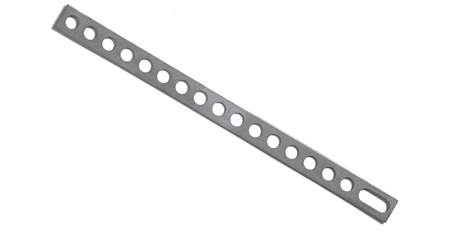
Your Crutchfield speaker purchase will include mounting brackets and speaker wiring harness adapters (Crutchfield Research Photo)
Replacing the 4Runner's factory speakers
Regardless of whether your truck has the base or JBL system, the 4Runner's speakers are generally easy to deal with. Upgrading the receiver and speakers in this truck that can be really rewarding for the novice car audio DIY-er. You can do this!

The dash tweeters are wired in parallel with the door speakers (Crutchfield Research Photo)
Removing the dash speakers
The 4Runner’s dash tweeters are 2-1/2” models wired in parallel with the door speakers. Removal and replacement is pretty simple, but make sure you replace the JBL models with low-impedance aftermarket tweeters.
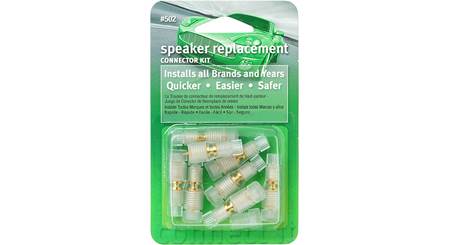
If your truck has the JBL system, there’s no wiring harness adapter available for the new speakers. You’ll need to use Posi-Products speaker connectors (much easier than splicing or soldering) to connect them to the factory wiring. With the base speakers, an adapter is available.
Once everything’s secure, test to make sure your new speakers are working. If they are, replace the grilles and get on with the rest of the speaker replacement process.
Tools needed: Panel tool, 10mm socket, ratchet and extension

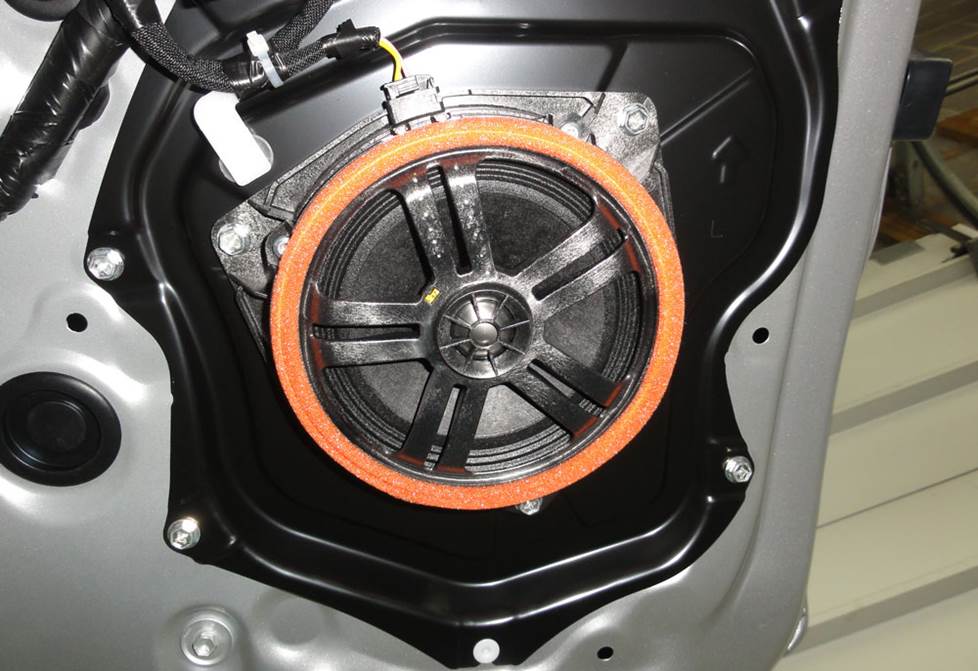
This is the front door speaker on the base system. The JBL models have a bright orange surround. (Crutchfield Research Photo)
Removing the front door speakers
In the 4Runner’s front doors, you’ll find a pair of 6”x9” stock speakers that are wired in parallel with the dash tweeters (see above). The base and JBL models are the same size and they can be replaced by a wide variety of aftermarket models. Just remember to look for low-impedance speakers to replace the JBLs. You’ll need mounting brackets to install certain sizes, and they’re included with your Crutchfield purchase.
These speakers are pretty easy to remove and replace, so it’s a great project for the car audio DIY newbie. Starting at the top corner, pry off the sail panel to release two clips and remove the panel. Starting at the top again, pry open the screw cover behind the door pull and remove one Phillips screw. Pry out the screw cover behind the door release and remove one Phillips screw, then pry open the screw cover below the door pull and remove another exposed Phillips screw.
With all that out of the way, you’re ready to use your panel tool and pry out the sides and bottom of the door panel to release eleven retaining clips. Once they’re loose, disconnect the wiring harness and the door lock and release cables, then remove the door panel.
Remove the four 10mm screws securing the speaker, then pull out the speaker, disconnect the harness, and remove the speaker. Once the old one’s out, you’re ready to connect the new speaker to the mounting bracket (if needed), connect the wiring harness adapter to the truck’s factory wiring, and secure the new speaker using the screws you just removed.
Note: In some select cases, you’ll need to drill out rivets that hold the stock speaker in place. That’s not the case with all speakers, but if it is, we’ll make sure you know about it while you’re shopping. If you need to drill, work carefully, know what you're drilling into, and wear eye protection.
Once everything’s connected and the speakers are secured, test the speakers to make sure they’re working. If they are, make sure the doors and windows are working properly and start putting the doors back together.
Tools needed: Panel tool, small flat-blade screwdriver, Phillips screwdriver, 10mm socket, ratchet and extension
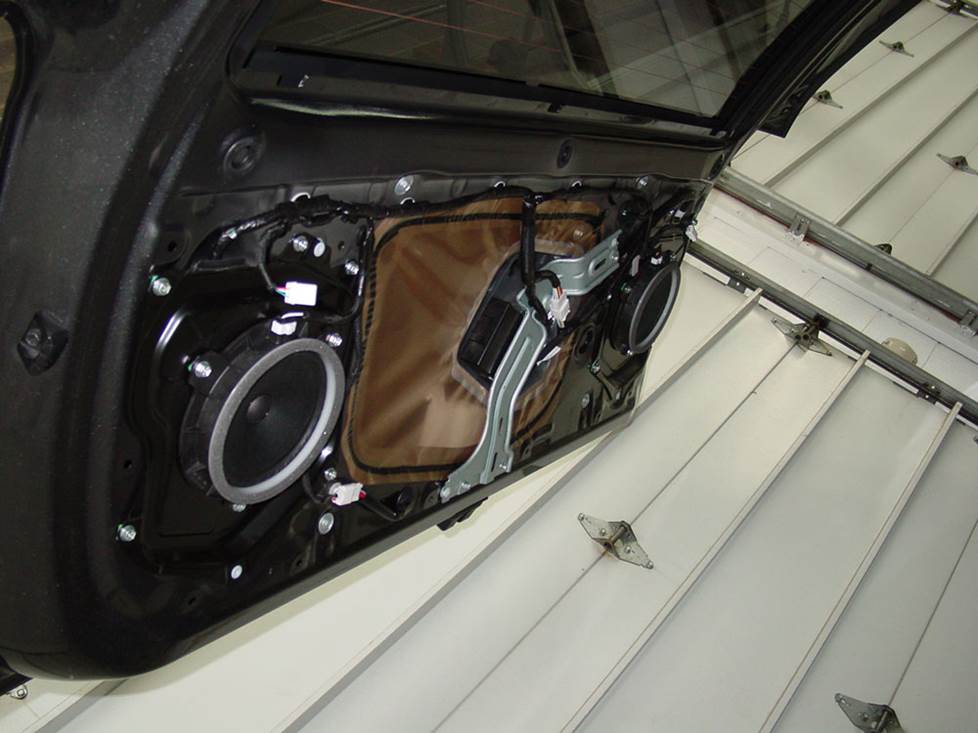
The JBL speakers have a 2-ohm impedance, so look for something similar when you're shopping for aftermarket replacements (Crutchfield Research Photo)
Removing the rear door speakers
The 4Runner’s rear doors are home to 6-3/4” stock speakers. The removal process is very straightforward and the results will be worth the work.
Starting at the top, pry open the screw cover behind the door release and remove one Phillips screw. Pry out the screw cover behind the door pull handle and remove one Phillips screw from that location. Next, pry open the screw cover below the door pull and remove another Phillips screw.
Pry out the sides and bottom of the door panel to release nine retaining clips, then disconnect the wiring harness and the door lock/release cables before removing the door panel. With the speaker exposed, all you need to do is remove the three 10mm screws securing the speaker and remove the speaker from the door. Secure your new speaker to the adapter bracket included with your Crutchfield speaker purchase and connect the wiring harness adapter to the truck’s wiring.
Repeat on the other door, then test the speakers to make sure everything’s working. If they are, and you hear sweet, sweet music, start putting the doors back together. Make sure the doors and windows are working properly before you do that, of course.
Tools needed: Panel tool, small flat-blade screwdriver, Phillips screwdriver, 10mm socket, ratchet and extension
The hatch speakers are harder to photograph than they are to replace (Crutchfield Research Photo)
Removing the cargo hatch speakers
The 6-3/4” hatch door speakers are pretty easy to deal with and there are plenty of great aftermarket speakers that will fit here.
To remove the stock speakers, you’ll start at the bottom and pry out the sides and bottom of the cargo door panel to release twelve retaining clips. Disconnect the light harnesses and remove the panel. Next, you’ll need to remove the three 10mm screws securing each speaker to the door. Disconnect the wiring harnesses, remove the speakers, and set them aside.
All you need to do from here is connect the new speaker wiring adapters to the vehicle speaker harness and secure the new speakers with the screws you removed earlier. In many cases, you’ll need speaker adapter brackets and they’ll be enclosed with your Crutchfield speaker purchase.
Tools needed: Panel tool,10mm socket, ratchet and extension

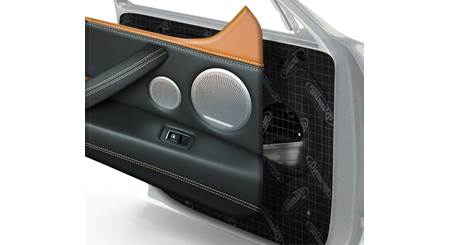
It takes a lot of work to get to the 4Runner's JBL subwoofer (Crutchfield Research Photo)
Replacing the rear side subwoofer
The JBL system includes an 8” subwoofer that’s located behind the passenger-side cargo trim panel. It’s a dual-voice coil design and each voice coil has a 2-ohm impedance. As noted above, a 2-ohm aftermarket sub will give you the best possible sound quality.
Considering the amount of disassembly you’ll have to do just to get to the stock sub, it’s important to keep things like that in mind. By our count, replacing the sub involves 22 separate steps and a fairly healthy chunk of time, so every little bit helps. We’d list them all, but this article is long enough as it is and it’s all covered in your Crutchfield MasterSheet anyway.
Replacing the sub is a thoroughly do-able DIY project, but it’ll take time, patience, organization, and a bit of skill. We don’t want to discourage you, but we do want you to know what you’re getting into.
Tools needed: Panel tool, 10mm, 12mm & 14mm sockets, ratchet and extension, Phillips screwdriver, Torx T-20 driver, drill with 1/8" bit, patience, time, the occasional break, deep cleansing breaths
Read our Car Speakers Buying Guide for more information.
Shop for speakers that fit your Toyota 4Runner

There's plenty of room for bass back here, so if you want a big sub box, go for it (Crutchfield Research Photo)
Bass in your 4Runner
Like most 4Runner owners, you probably use the cargo area for hauling, well, cargo. But if you want to add some big, booming bass, you have a 41" W x 17" H x 31"/39" D area to work with. That'll definitely hold an impressive subwoofer box. If you want more bass, but don't want to fill your cargo hold with a massive box, a more compact powered subwoofer will enhance your sound without taking up space. And you can remove it easily when it’s time to load up the camping gear.
Learn more about building a bass system in our Car Subwoofer Buying Guide.
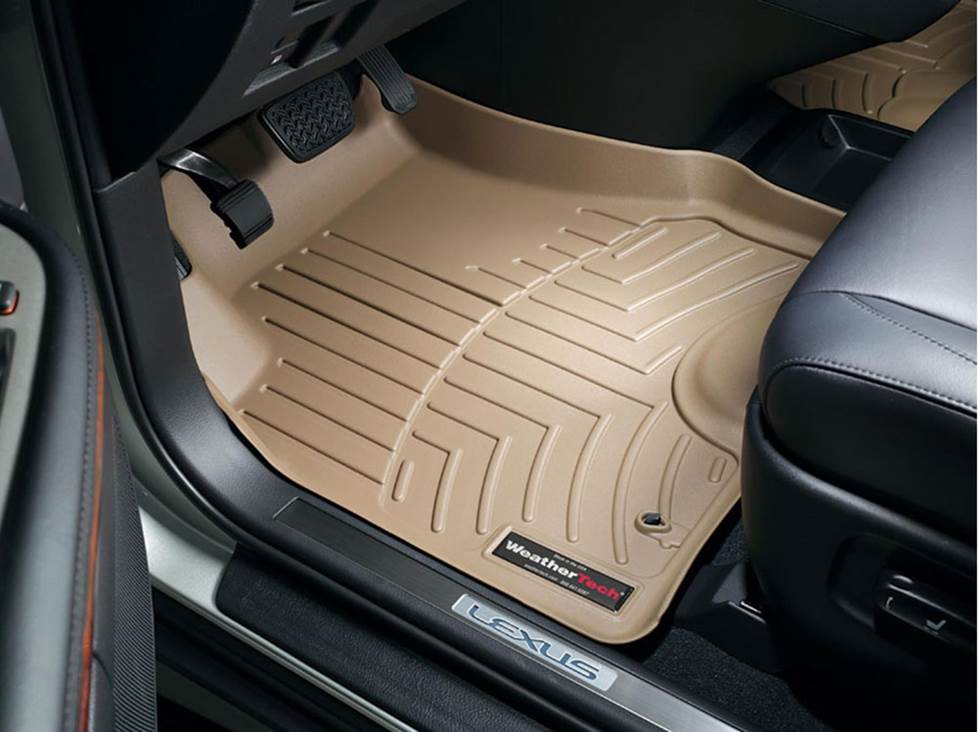
This is a stock photo, which explains the Lexus logo. Your WeatherTech floor liners are designed to fit your 4Runner.
Other options for your 4Runner
Here are some other smart, functional additions for your truck.
Floor mats to protect your carpet
When you drive a 4Runner you're eventually going to get involved in some sort of truck-like activity that gets you and/or it dirty. When that happens, it's a good idea to have a set of WeatherTech liners on the floors and especially in the cargo area. These incredibly durable mats trap moisture, contain dirt, and keep your factory carpets looking good. To see all the mats that fit your truck, enter your vehicle info.
Add an amp (or two) for better sound
A new 4-channel amplifier will help you get the most out of your new speakers, especially if you're replacing the base system. You'll get cleaner power (and a lot more of it), which will result in much, much better sound. A mono amp can provide the juice you need for your new subwoofer, too. Learn more about adding amps to your system in our Car Amplifier Buying Guide.

Adding some Dynamat will help quiet road roar in your 4Runner
Sound damping to block noise
If you're tired of wind and road noise getting in the way of your audio enjoyment, A Dynamat Xtreme Door Kit is the perfect way to seal in sound. This heavy-duty insulating material is easy to install, and it really makes a difference. One kit will take care of the front doors in your 4Runner.
Remote start and security systems
Adding remote start capability to your vehicle lets you warm it up in the winter or cool it down in the summer. The iDatastart system is incredibly convenient and makes it easier than ever to install a remote start system, so we highly recommend it. The module requires a vehicle-specific T-harness (sold separately) to connect with your vehicle's computer, security, and ignition systems, so we ask that you call to order so that we can make sure you get the right harness for your ride.
You can also talk to your Crutchfield Advisor about a security system. They’re not as easy to install (we usually suggest letting a professional do the job), but we can help you choose a system that’ll work in your vehicle.
Let's get started!
Ready to shop? Use our vehicle selector to find the gear that will fit your car or truck. If you have questions, give us a shout via phone, chat, or email
Comments (5)
Please share your thoughts below.


Jackie from Asheville, North Car
Posted on 12/22/2021
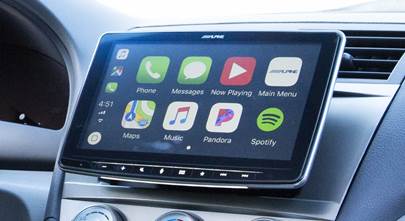
Replace Alpine on Toyo 4Runner 2010. Apple Car Play. Suggestions. Install difficulty? Thanks
Jon Paul from Crutchfield
on 12/22/2021
Gary from Wilmington, nc
Posted on 2/12/2021
I have a 2016 4Runner Ltd with the JBL system. My front dash mounted tweeters appear to have blown. I get distortion at half volume. No matter the source, no other speakers seem to be faulty. So I only want to replace the front speakers, nothing else. Can this be done with a pair of low impedance speakers? If so, what do you recommend?
Jon Paul from Crutchfield
on 2/15/2021
Yediel from Puerto Rico
Posted on 7/31/2020
Great write-up. I have a question related to the "Party Mode". Is there a way to eliminate/bypass this configuration in order to have all 6 speakers always on?
Jon Paul from Crutchfield
on 7/31/2020
Paul Kengor from New York
Posted on 7/29/2020
I have a 2019 Toyota 4Runner with the JBL system and am considering changing all six speakers, putting components in the front and coaxial in the rear and tailgate. Am going to add a subwoofer box with its own seperate amp; Am looking to power speakers with 100 + RMS ratings, my question is for the speakers, should i get a 6 channel amp?
Jon Paul from Crutchfield
on 7/30/2020
Pedro rubio from Washington D.C.
Posted on 6/20/2020
Hey man thanks for the Info it helped me out a lot. I really want the color wires that are coming out behind the stereo running to the factory amplifier. Please I would appreciate it if you can respond to my messsge thank you.
Jon Paul from Crutchfield
on 6/22/2020