2008-2016 Ford F-250 and F-350
Upgrading the stereo system in your F-250 or F-350

In brief: This Crutchfield Research Garage article gives you an overview of your truck's stock stereo system and your aftermarket upgrade options. We'll tell you all about:
- The factory stereo system
- Removing the factory radio
- Removing the factory speakers
- Adding more bass
- Other options for your Ford F-250 or F-350
Then, use our vehicle selector to find the gear that will fit your Ford.
Overview of the Ford F-250 and F-350
Trucks are like cowbells in that sometimes the only answer is more truck. The wildly popular Ford F-150 will do all sorts of cool truck things, but if you need to haul more and tow more, you're gonna need more truck. Ford's F-250 is a whole lot of truck, and the F-350 is even more truck than that.
Apparently, there are a lot of people who need all the truck they can get, because there are tons (literally) of these "Super Duty" pickups on the road today. Whether you're hauling a load of lumber to a construction site or towing your boat to the river, these trucks are ready for work. But a rockin' stereo system will make any trip seem a little less like work and more like fun.
The F-250 and F-350 were available in Regular, SuperCab (pictured above) and SuperCrew versions, with the only real difference (stereo-wise, anyway) being the rear speakers. For that reason, we've consolidated all three body styles into one article.

There's the base radio (shown) and an optional nav receiver (Crutchfield Research Photo)
The factory stereo system
While parts of the F-250 and F-350 seem almost over-designed, the factory radios are basically the same off-the-shelf Ford pieces you'd find on an F-150. These trucks offered trim levels ranging from stripped-down work truck to leather-lined luxury hauler, so the audio options started with a standard AM/FM radio and topped out with a factory navigation receiver and, with the Audiophile option, extra speakers.
The stock stuff is adequate at best, and, let's face it, powerful vehicles like these demand powerful sound systems. With a wide variety of aftermarket receivers and speakers to choose from, you'll have no trouble finding a combination of gear that sounds great in your truck.

This dash kit allows you to install a single-DIN receiver in your truck (Crutchfield Research Photo)
Removing the factory radio
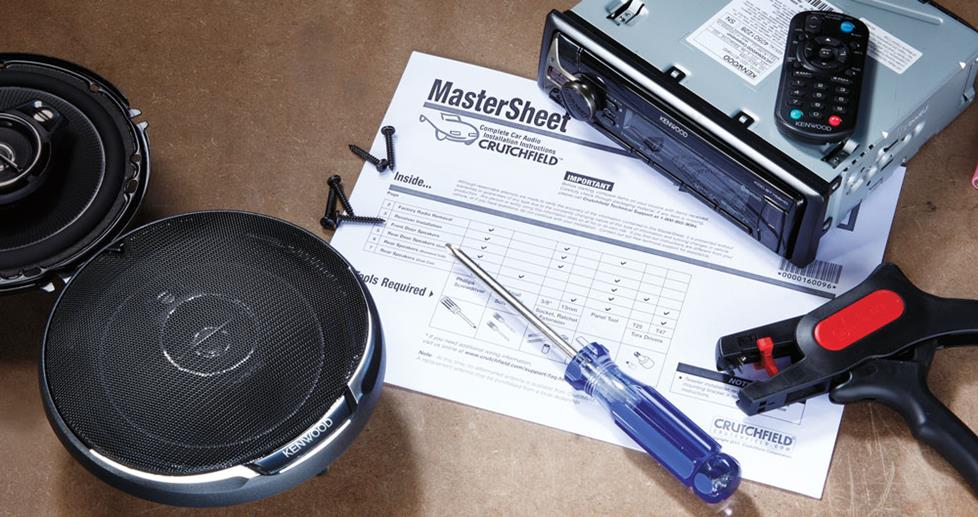
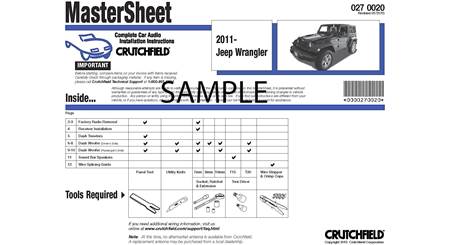
Thanks to Ford's "modular design" philosophy, removing and replacing the radio in these trucks is relatively simple. A truly vast array of single-DIN (2" tall) and double-DIN (4" tall) receivers will fit in the space, so you have lot of options to choose from. You'll need a dash kit to help the new stereo blend into the dash, and Crutchfield offers those (and wiring harness adapters, too) at a significant discount along with your purchase. Our illustrated, step-by-step Crutchfield MasterSheet disassembly instructions are included free.
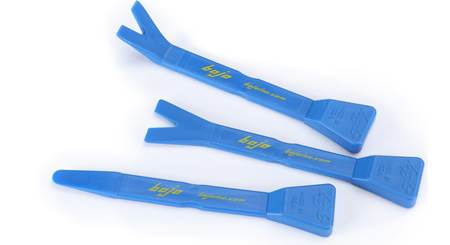
All the details can be found in that document, but we'll take a quick look at the basics. You'll start by using a panel tool to pry around the edges of the cigarette lighter trim panel and release the retaining clips. Be careful while you’re doing this to avoid damaging the clips. Once that's done, pull out the trim panel and disconnect the wiring harnesses. Remove (but don't toss) the four 7mm screws securing the factory radio, then pull it out, disconnect everything, and set it aside.
Detailed stereo and speaker removal instructions
Remove the DIN sleeve from the new receiver and slide it into the receiver mounting bracket, then secure it by bending the metal tabs. Slide the receiver into the sleeve and connect the receiver wiring adapter to the receiver by following the included instructions.
Connect the receiver wiring adapter to the factory harness, plug the antenna lead into the rear of receiver, then slide the entire assembly into the dash and use the screws you removed earlier to secure everything to the dash. All you need to do now is test everything out to make sure it's working, then put the dash back together and start enjoying your new stereo.
Tools needed: Panel tool, 9/32" socket, ratchet & extension
Read our Car Stereo Buying Guide for shopping tips and advice.
Steering wheel audio controls
In most cases, it's reasonably easy to retain your truck's steering wheel audio controls when you install a new stereo. When you enter your vehicle information, our database will choose the adapter you need to make your factory steering wheel controls work with a compatible aftermarket receiver.

Replacing the speakers is pretty uncomplicated in these trucks (Crutchfield Research Photo)
Removing the factory speakers
The number and location of your truck's speakers will vary according to cab style and stock stereo package. They're all reasonably easy to remove and replace.

The center dash speaker is pretty easy to deal with (Crutchfield Research Photo)
Removing the center dash speaker
Your truck's center dash speaker (if present) is a 3-1/2" 8-ohm model that's reasonably easy to remove and replace. There's no wiring harness available, though, so you'll need to splice, solder, or use Posi-Products speaker connectors to connect the new speaker (there are plenty to choose from) to the truck's wiring.
Tools needed: Panel tool, Torx T20 driver

The Audiophile tweeters are wired in parallel with the woofers (Crutchfield Research Photo)
Replacing the front door tweeters (Audiophile)
The Audiophile tweeters are located in the front door sail panels. The factory tweeter has a physical size of 1.721" and is wired in parallel with the door woofer. This speaker receives a full range signal and employs an in-line crossover at the tweeter location.
You'll need to pry off the sail panel/tweeter housing to release the retaining clips, disconnect the harness and remove the assembly. Next, remove three Phillips screws, pry out the clip securing the tweeter/harness assembly to the sail panel, and remove the assembly.
No mounting bracket is available for this location, so you'll need to create one using our universal backstraps (or hot glue or silicone). You'll also need some more Posi-Products speaker connectors to attach your new tweeters to the factory wiring.
Tools needed: Panel tool, Phillips screwdriver

Once you remove the door panels, the speakers are pretty easy to work with (Crutchfield Research Photo)
Replacing the front door speakers
The stock 6"x8" door speakers are reasonably easy to reach and replace with same-size models or smaller 5-1/4" speakers. If you go with the smaller models, you'll need speaker mounting brackets, which are included at a deep discount with your Crutchfield speaker purchase.
You'll start the replacement process by prying off the sail panel (present whether the truck has tweeters or not) and releasing two metal retaining clips. What you do next depends on whether your truck has manual or power windows, but it's not complicated either way. Both versions are covered in the illustrated Crutchfield MasterSheet that's included free with your stereo or speaker purchase.
You'll then need to remove the door panel. Pry the off reflector lens from the lower corner of the door panel, then remove the 9/32" screw beneath. Lift the door panel, disconnect the electrical harness (if equipped), and remove the door panel. Remove four 1/4" screws securing the factory speaker to the door, then pull it out, disconnect it, and set it aside.
Installing a new speaker is simply a matter of connecting the new one's wiring adapter to the truck's speaker harness, then using the screws you removed earlier to secure the speaker. Once you've tested the speakers to make sure they're producing sound, start putting the door back together.
Tools needed: Panel tool, small flat-blade screwdriver, 1/4", 9/32", 7/32" sockets, ratchet, and extension, Torx T-20 driver

A bird's eye view of the rear side panel speakers (Crutchfield Research Photo)
Replacing the rear side panel speakers (Regular and Crew Cab)
In these trucks, the rear speakers are conveniently located in the side panels behind the rear seat. These 6"x8" models can, like their cousins in the doors, be replaced by same-size models or smaller 5-1/4" speakers. You'll need speaker mounting brackets for the smaller ones, of course. To replace them, you'll need to pry away some panels and get the seat belts out of the way, but it's not terribly difficult.
Starting at the edge closest to the seat, pry up the door scuff plate to release the retaining clips, and remove the plate. Next, pry open the seat belt anchor cover, remove a Torx T50 bolt, and lower the seat belt to the floor.
Starting at the top, pry out the edges of the rear side panel and release the retaining clips that run all the way to the bottom of the panel. Remove the side panel and set it aside. You can leave the belt in the panel, which makes life a bit easier.
The speaker is held in place by four 7mm screws. Remove those, disconnect the harness, then set the speaker aside. As with the front doors, connect the new speaker's wiring adapter to the truck's speaker harness, test everything out and, if it works, start putting things back together. For safety's sake, please make sure the seat belt anchors are secured properly before you hit the road.
Tools needed: Panel tool, 7mm driver, Torx T-50 driver

The SuperCab has its rear speakers in the doors (Crutchfield Research Photo)
Replacing the rear door speakers (SuperCab)
The SuperCab's rear doors contain a pair of 6"x8" speakers, and they're pretty easy to deal with. Remove the two Phillips screws securing the window latch, then pry open the upper seat belt anchor cover and remove one Torx T-50 bolt. You can let the seat belt hang while you continue to work.
Pull out on the window trim panel to release six clips. Remove the panel, then remove three 7mm screws and one center push pin clip exposed when you removed the window trim. Pry open the lower seat belt anchor cover and remove one Torx T-50 bolt, and let the seat belt hang a little longer.
Lift up on the door panel to clear the plastic "legs," then set the panel on the ground. With the panel out of the way, you can remove the four 7mm screws securing the speaker to door. Disconnect the harness, remove the speaker, and get ready to install the new one.
Tools Required: Panel tool, Phillip screwdriver, 7mm driver

The Audiophile rear tweeters are attached to the door panel (Crutchfield Research Photo)
Replacing the rear door tweeters (CrewCab Audiophile)
The rear tweeters measure 1.716" apiece, and they're wired in parallel with the rear side panel woofers. You'll need to remove the door panels to reach these speakers, and you'll find complete instructions in your Crutchfield MasterSheet.
No mounting bracket is available for this location, so you'll need to create one using our universal backstraps. You'll also need some Posi-Products speaker connectors to attach your new tweeters to the factory wiring. Don't worry, though — if you bought a pack for the front tweeters, you'll have plenty left over for these.
Tools needed: Panel tool, 7mm driver, Torx T-9 driver
Read our Car Speakers Buying Guide for more information.

You'll need a shallow-mount sub to replace the factory model (Crutchfield Research Photo)
Bass in your F-250 or 350
The Audiophile system's 8" dual-voice coil subwoofer is located in a polymer enclosure behind the rear seat. It's powered by an amplifier that is attached to the back of the enclosure. The factory system sends only bass frequencies to this sub, so a replacement aftermarket speaker will also only play bass.
Removing it is reasonably simple, though it's a bit tight back there and you'll want to work carefully. Start by removing the Torx T-55 bolt securing the driver's side of the enclosure to floor, then remove the four 10mm bolts that secure the passenger's side. Disconnect the harness, then lift up on the passenger's side, pull it towards that side of the truck and work the sub enclosure out from behind the seat.
If you're going to replace the sub and keep the stock enclosure, you'll get the old sub out by removing the eight Torx T-20 screws that hold it in place. When you're shopping for a new one, you'll need to stick with shallow-mount subs for obvious reasons.
Like we said, it's tight back there, but if you want to go even bigger on bass, there are some vehicle-specific enclosures that will fit back here, whether your truck had a factory sub or not. You can choose from unloaded, loaded, and amplified versions, and some are available in colors to match your interior, There's also room back there for a compact Class D amp that will deliver some serious power.
Tools needed: Torx T-20 & T-55 drivers, 10mm socket, ratchet, and extension
Learn more about building a bass system in our Car Subwoofer Buying Guide.

Adding Dynamat will reduce the effect of wind and road noise (Crutchfield Research Photo)
Other options for your Ford truck
Here are some other smart upgrade ideas for your F-250 or F-350
Quiet the roar with sound damping
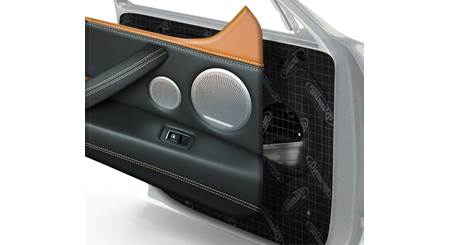
Your Ford Super Duty is to lesser pickups what an alpaca farm is to a rooftop herb garden. It’s big, it's bluff, and it's only slightly less aerodynamic than the trailer it's probably towing. To prevent wind noise and road roar from undoing the great work your new stereo is doing, make sure you install Dynamat when you're replacing your speakers. This soundproofing material is a great way to dampen the sounds you don't like and get more enjoyment out of the ones you do.
For more information on installing Dynamat in a pickup, check out an informative series of articles on our 2004 F-150 project truck. The details are a bit different, but it's a great way to see what's possible.
Improve visibility with a rear-view camera
With or without a trailer, these trucks are big, tall, and hard to maneuver. A rear-view camera can be a massive help when you're backing up in a crowded parking lot. Or an open field, for that matter. We offer cameras from Kenwood, Alpine, Pioneer, and more. Some are designed to work with same-brand receivers only, but others come with a composite video connector and will work with almost any video receiver.
Preserve your carpets with floor mats
If you drive an F-250 or F-350, you're probably going to track some mud and muck into your truck every now and again. When that happens, it's a good idea to have a set of WeatherTech Floor Liners protecting the carpeting. These incredibly durable mats trap moisture, contain dirt, and keep your factory carpets looking good.
Security systems and remote start
Installing a security system in your F-250 or F-350 won't be easy (security systems rarely are), but it's definitely a good idea if you tow long distances and stop overnight. Our Crutchfield Advisors can help figure out what you need to get the job done, but we usually recommend taking your truck to a professional installer.
Adding remote start capability to your truck lets you warm it up in the winter or cool it down in the summer. Installation is usually easier with these systems, but we still ask that you call to order so that we can make sure you get the right harness for your ride.
Let's get started!
Ready to shop? Use our vehicle selector to find the gear that will fit your car or truck. If you have questions, give us a shout via phone, chat, or email
Comments (1)
Please share your thoughts below.








Brian from dickinson
Posted on 9/24/2020
I have a 2011 f250 lariat with sync navigation stereo and factory amp and wanting to replace it with a aftermarket head unit with nav that actually works. I know I can physically install it but can it be installed with the factory amp? What else do I need to make it work out do I need to just rewire everything and ditch the factory amp
Jon Paul from Crutchfield
on 9/25/2020