2004-2009 Mazda 3
How to upgrade the stereo system in your Mazda 3

In brief: This Crutchfield Research Garage article gives you an overview of your car's stock stereo system and your aftermarket upgrade options. We'll tell you all about:
- The factory stereo system
- Removing the factory radio
- Removing the factory speakers
- Adding more bass
- Other options for your Mazda 3
Then, use our vehicle selector to find the gear that will fit your Mazda.
Overview of the Mazda 3
Who says a daily driver has to be boring and slow? Not Mazda. Few car companies spend so much time making sure that there's a little RX-7 baked into everything they make. The 2004-09 3, for example, looks like an everyday econobox, but it sure doesn't drive like one. It's a fun little car that looks good, feels good, and makes ordinary driving seem a lot less ordinary.
Available as a 4-door sedan or a tidy little 5-door hatchback, the 3 packs a usable amount of space into a compact package. If you want to fill that space with better sound, you've come to the right place.

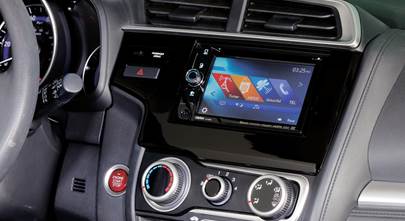
All the 3 radios look pretty much the same, and they're also pretty easy to remove (Crutchfield Research Photo)
The Mazda 3's factory stereo system
The 3 was offered with 4- and 6-speaker standard systems, plus a 7-speaker Bose® system that added a subwoofer. They're all pretty easy to deal with, but there are some things you need to know before you start shopping.
Depending on what you're starting with, replacing the radio can mean losing some factory features. If you have the regular receiver, you'll lose the factory satellite radio. If you're replacing the nav radio, you'll lose the satellite radio, you won't be able to adjust the factory clock anymore, and you'll lose the nav system's voice guidance system.
In both cases, the driver info display will be affected, but how much depends on whether your car has manual or automatic climate controls. For the manual, the driver info center won't work at all anymore. In the case of the automatic, you'll only be able to see climate control info.
The Bose® system includes an amp, located under the driver's seat, and a 5-1/4" sub, found under the passenger's seat. They're pretty easy to reach — just slide the seat all the way back.
If you're planning to bypass the Bose® system's amp, we recommend replacing the low-impedance factory speakers with standard 4-ohm aftermarket speakers to prevent overheating and other damage to your new radio. Of course, you can also broaden your speaker options by adding an aftermarket amplifier.

Once you remove the stock radio, you can replace it with a single-DIN (2" tall) or double-DIN (4" tall) aftermarket stereo (Crutchfield Research Photo)
Removing the Mazda 3's factory radio
The stock radio is actually pretty easy to remove and replace. Before you get started, set the parking brake and disconnect the negative battery cable to prevent any electrical short. Once that's done, you're ready to go.
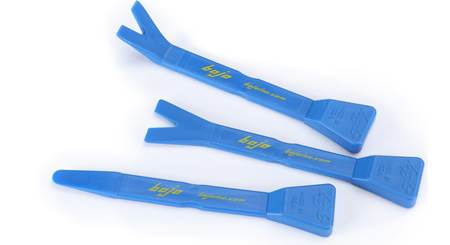
Grab a panel tool and carefully pry out the edges of the receiver display trim. Work across the trim, until you can remove it. Once it's out of the way, remove two Phillips screws from the top edge of the radio, then pry out the top of the radio assembly to release the retaining clips. Pull the whole thing out, disconnect the harness, and set the old piece aside.
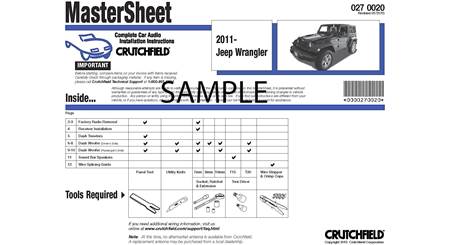
When you buy your new receiver from Crutchfield, we'll give you a healthy discount on the dash kit and wiring harness needed for installation. Follow the instructions that come with each one, then test the receiver to make sure it's working properly. If it is, reverse the removal process to button up the dash and finish the job.
Tools needed: Panel tool, Phillips screwdriver
Read our Car Stereo Buying Guide for shopping tips and advice.
Shop for car stereos that fit your Mazda 3
Steering wheel audio controls
In most cases, it's reasonably easy to retain your car's steering wheel audio controls when you install a new stereo. When you enter your vehicle information, our database will choose the adapter you need to make your factory steering wheel controls work with a compatible aftermarket receiver.

The 5-1/4" Bose® subwoofer is located under the passenger's seat (Crutchfield Research Photo)
Removing the factory speakers
The 3 has speakers in the front and rear doors. How many depends on the system you're working with, but they're all pretty easy to deal with.

The base speakers are full-range models, but premium systems have component speakers (Crutchfield Research Photo)
Removing the front door speakers
The 4-speaker system has full-range speakers in the front and rear doors. The 6- and 7-speaker systems have component speakers in the front doors, and they're wired in parallel. The Bose system's speakers are low-impedance models, so you'll want to keep that in mind when you're choosing your new speakers.
You'll need to remove the door panels to replace any of the speakers, a process that begins with prying off the sail panels. If there's a tweeter in there, disconnect the wiring harness and remove the panel.
Use a panel tool to pry open the screw cover in the door release trim. Starting at the front edge, remove the exposed Phillips screw and then remove the trim piece. Next, pry open the screw cover under the door pull handle and remove one Phillips screw.
If your car has manual windows, grab a clean shop rag and remove the crank by working it loose with a back-and-forth motion. If you have the fancypants power windows, pry up the power options switch panel from the rear edge, then lift it off, disconnect it, and set it aside.
Finally, you'll pry around the sides and bottom of the door panel to release the retaining clips. Once that's done, you can remove the panel and store it someplace safe while you work on the speakers.
The 1.414" tweeters (if present) can be replaced by all sorts of component tweeters. That's a good way to improve your sound. All you need to do to remove the old ones is pry out the clips securing the stock tweeters to the back of the sail panels. Replacing them will necessitate the use of universal backstraps (or hot glue or silicone), since there's no aftermarket bracket out there. You'll also need to use Posi-Products speaker connectors to connect the new tweeters to the factory wiring.
The 6"x8" lower door speakers, be they woofers or full-range, are also pretty easy to deal with once the door panels are out of the way. All you need to do is remove the four Phillips screws securing the factory speaker. Pull it out, disconnect it, and remove it. Once you've installed both of the new ones, test them and make sure they're working. If they are, start putting the doors back together. Be sure to test the locks and windows to see that they are working as they should,
If your new speakers need mounting brackets, they'll be included with your Crutchfield speaker purchase.
Tools needed: Panel tool, Phillips screwdriver, small flat blade screwdriver, shop rag

Here's a close-up look at a Bose rear speaker (Crutchfield Research Photo)
Removing the rear door speakers
Pry open the screw cover in the door release trim, starting at the front edge. Remove the exposed Phillips screw, then remove the trim. Next, pry open the screw cover under the door pull handle and remove one Phillips screw.
As with the front doors, the next step depends on whether your car has manual or power windows. Grab the shop rag or the panel tool and do what needs to be done.
With that out of the way, pry around the sides and bottom of the door panel to release the retaining clips, then remove the panel. Remove the four Phillips screws securing the stock speaker and remove the old speaker.
From here, the speaker installation process is the same as up front. Be sure to test the speakers and check the locks and windows before you button everything up again.
Tools needed: Panel tool, Phillips screwdriver, small flat blade screwdriver, shop rag
Read our Car Speakers Buying Guide for more information.
Shop for speakers that fit your Mazda 3

There's some room in the trunk area for a subwoofer box (Crutchfield Research Photo)
Bass in your Mazda 3
The 3 is not a big car, but there is some room for a subwoofer box. Not a ton of room, mind you, but some. The hatchback offers a 40" W x 16" H x 30"/23" D space, while the sedan offers a 40" W x 17" H x 36"/28" D space. That's if you're thinking about a standard-type sub enclosure, of course. You can get pretty creative back there if you don't care so much about cargo space. If you do care about cargo space, you can go with a more compact powered subwoofer.
Learn more about building a bass system in our Car Subwoofer Buying Guide.

The SiriusXM Onyx Plus is a great way to add satellite radio to your car
Other options for your Mazda 3
Here are some other cool ideas for your Mazda.
Add an amp (or two)
A new 4-channel amplifier will help you get the most out of your new speakers. You'll get cleaner power (and a lot more of it), which will result in much, much better sound. A mono amp can provide the juice you need for your new subwoofer, too. Learn more about adding amps to your system in our Car Amplifier Buying Guide.
Satellite radio
Don't want to replace the stock radio? You can add Dock-and-Play SiriusXM satellite radio to the factory system to enjoy commercial-free digital music. Still want a new receiver? Look for an aftermarket model that’ll work with an outboard SiriusXM tuner.
Protect your car with a security system
Installing a security system in your Mazda 3 isn't easy (security systems rarely are), but it's definitely a good idea. Our Crutchfield Advisors can help figure out what you need to get the job done, but we usually recommend taking your car and new gear to a professional installer.
Let's get started!
Ready to shop? Use our vehicle selector to find the gear that will fit your car or truck. If you have questions, give us a shout via phone, chat, or email





Comments (0)
Please share your thoughts below.