1983-1992 Ford Ranger and Bronco II
How to upgrade the stereo system in your Ranger or Bronco II

In brief: This Crutchfield Research Garage article gives you an overview of your truck's stock stereo system and your aftermarket upgrade options. We'll tell you all about:
- The factory stereo system
- Removing the factory radio
- Removing the factory speakers
- Adding more bass
- Other options for your Ranger or Bronco II
Then, use our vehicle selector to find the gear that will fit your vehicle.
Overview of the Ford Ranger and Bronco II
It’s taken a while, but auto manufacturers are slowly realizing (re-realizing?) that not everyone needs a pickup that takes up one-and-a-half parking spaces and is capable of pulling a medium-sized house off its foundation. Hence the return of trucks like the new Ford Ranger, a midsize pickup that’s designed for the type of trucking most pickup owners actually do.
That was also the point of the old Ford Ranger, come to think of it. The first-gen Ranger, which was more of a "mini-truck," debuted as a 1983 model and hung around in slightly revised form until 1992. These boxy, tough little trucks were seemingly everywhere back in the day, driven by everyday workers, weekend fun-seekers, and suburbanites who needed an extra vehicle to haul mulch and make runs to the dump.
Thanks to all those people doing all those things over all those years, first-gen Rangers aren’t as common as they used to be, but they’re still out there. Considering the rising interest in smaller trucks, plus the growing nostalgia for all things eighties and nineties, a “survivor” Ranger is a cool thing to have — or to want.
Note: Most of the info also applies to the Bronco II as well, and we'll look at rear side speaker removal below.

You can replace the stock radio with a variety of single-DIN aftermarket models (Crutchfield Research Photo)
Factory stereo system
Back when these trucks were new, pickup owners (especially compact pickup owners) didn’t expect their vehicles to offer the same luxury and technology features as the cushy sedans at the other end of the dealer’s lot. Some were nicer than others, but at the end of the day, the average Ranger was mostly "just a truck."
In keeping with that philosophy, the stock stereo systems consisted of just a radio and some speakers. The speaker arrays changed a bit over the years, but the overall sound quality never moved much beyond "loud enough to drown out the road noise, mostly."
Detailed stereo and speaker removal instructions
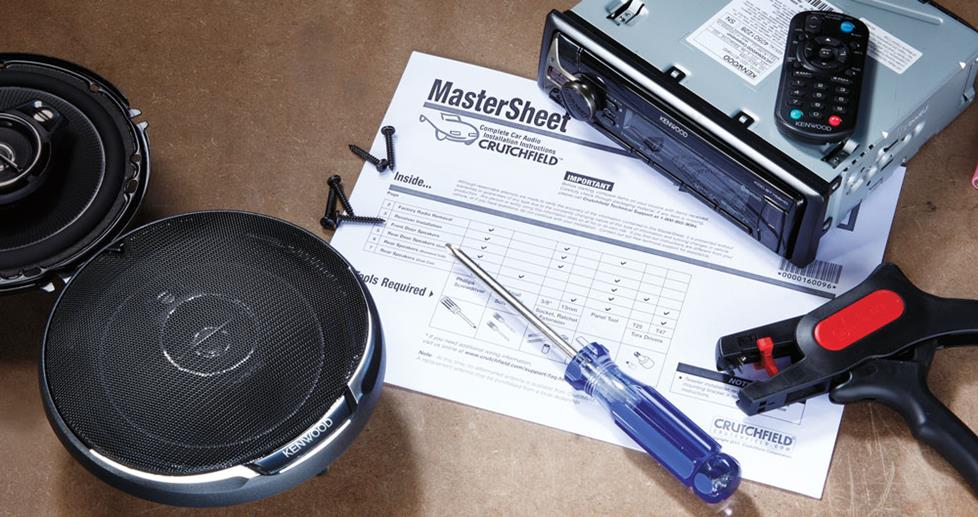
It’s entirely possible that either you or a previous owner decided to install aftermarket gear somewhere along the line. Either way, assuming the speakers haven’t turned to dust, they’re probably not up to their previous (low) levels of performance. If you’re still enjoying your Ranger, you deserve to enjoy your music, too.
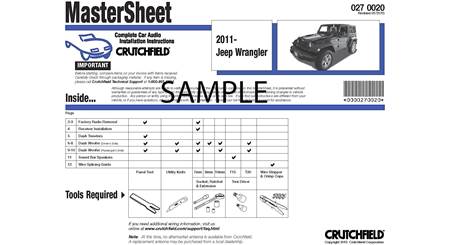
In this article, we’ll take a broad look at the what’s and how’s of upgrading your truck's audio. There were several interior design changes over the years, and there’s a Crutchfield MasterSheet™ detailing the disassembly and installation process for your truck. Enter your vehicle information to see what’s available for your Ranger or Bronco II.
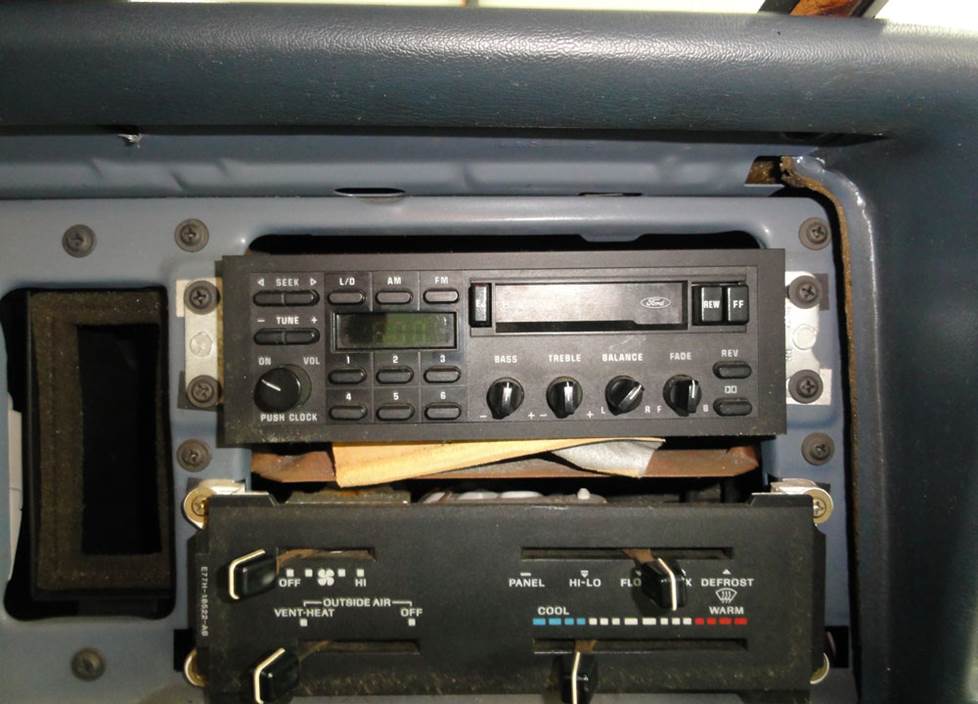
Removing the dash panels is a part of the radio removal process (Crutchfield Research Photo)
Replacing the factory radio
In 1983-1988 trucks, the factory radio was a "shaft style" model. The receiver unit sits behind the dash panel and the trim plate and control knobs attach on the front side of the panel.
If you want to replace this receiver while keeping a "period-correct" look, we recommend receivers from Retrosound. These digital media receivers fit right in, and in many cases, you’ll have your choice of knob and display styles. On the other hand, if your idea of "period correct" is jamming down the road while listening to a favorite CD, a standard single-DIN (2" tall) aftermarket radio can also work in the early trucks.
In either case, you’ll need to run new speaker wire from the aftermarket receiver to each speaker.
For the 1989-1992 models, Ford subbed in a more modern, not-exactly-single-DIN unit. While there are plenty of single-DIN aftermarket receivers that’ll work here, the dash trim panel will need to be modified slightly to accommodate the new receiver’s DIN sleeve. Be aware that the factory radio cannot be reinstalled once you've modified the dash panel.
You’ll also need to create a backing plate to fill the gap around your new receiver. That’s not as hard as it sounds, since we offer several different solutions that’ll help. If you have questions, give us a call or chat. Our expert advisors can help you choose something that will work for you and your truck.
Before you start any audio upgrade project, be sure to set the parking brake and disconnect the negative battery cable to prevent any electrical short.
Tools needed: Depends on the model year. Consult your Crutchfield MasterSheet (included free with your stereo purchase) for a list of tools needed for your radio replacement project.
Read our Car Stereo Buying Guide for shopping tips and advice.
Shop for car stereos that fit your Ford Bronco II
Amplifier and antenna info
Amps get old and whip antennas lead very hard lives. If you need to replace either one in your Ranger or Bronco II, our Crutchfield MasterSheet has the info you need to get the job done.
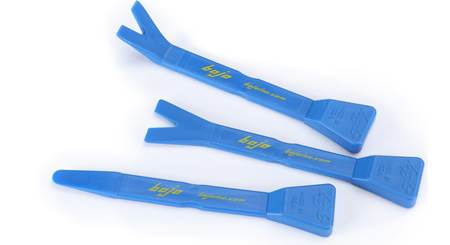
Tools needed: Phillips screwdriver, panel tool

The dash speakers (if present) are easy enough to deal with (Crutchfield Research Photo)
Removing the factory speakers
The number and nature of the factory speakers varied a bit over the original Ranger's long lifespan. Most of them are easy to remove and replace, but there are some things you'll want to know before you get started.
Removing the dash speakers
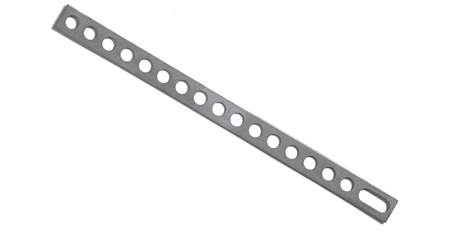
Early models included speakers in the dash corners, and they’re pretty easy to reach and replace. There are aftermarket speakers that can work here, but you’ll need to fabricate mounting brackets (or use our universal backstraps) to secure the new speakers in the cavities.
To get the old ones out, remove the two Phillips screws securing the speaker grille or dummy plate, then remove the three Phillips screws the securing speaker to the mounting surface. Pull the speaker out, disconnect it, and remove it.
Tools needed: Phillips screwdriver

As you can see, the door depth (or lack thereof) can be a hindrance when it's time to upgrade the speakers (Crutchfield Research Photo)
Removing the door speakers
Removing the factor door speakers is also pretty simple in these trucks. Installing the new ones is a wee bit more complicated, but this is nothing a reasonably adept DIY-er can’t handle.
If your truck has manual windows, the first thing to do is pry out the window crank handle cover and remove the Torx T15 screw holding it in place. From here, the removal process is the same as it is in trucks that have power windows.
Remove one Phillips screw at the door pull handle and another at the door release handle. If a map pocket is present, remove the two Phillips screws below the pocket.
Pry around the sides of the door panel to release the retaining clips, then lift the panel off and store it someplace clean and dry. Remove the three Phillips screws securing the speaker, then pull it out and set it aside.
Installing the new speaker
Depending on the age of your truck and some other variables, there are some things that might affect your speaker installation.
A wide variety of aftermarket speakers will theoretically fit in the doors, but depth matters and you might encounter interference between the speaker/grille and the door pocket or other interior parts. In some cases, you’ll need to cut the panel and the steel substructure, then drill new mounting holes. This isn’t hard, but you’ll definitely want to work carefully and wear eye protection.
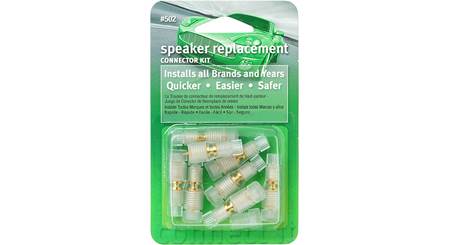
In other news, there might not be a wiring harness adapter available for this location. In that case, you’ll need to splice, solder, or use Posi-Products speaker connectors to connect your new speakers.
For more information, visit our Outfit My Car page and enter your vehicle information to see the speakers, stereos, and other audio accessories that will work in your Ranger or Bronco II. When you do that, we'll also give you a heads-up on speaker fit and wiring harness availability. If you have any questions, contact our advisors. They'll be happy to help.
Once your new speakers are connected and secure, test them to make sure they’re working. If they are, you’re ready to start putting the doors back together.
Tools needed: Phillips screwdriver, panel tool, drill, Torx T15 driver (manual windows only)

This ancient plastic box houses a rear speaker. You should remove and replace the whole thing. (Crutchfield Research Photo)
Removing the rear speakers (Ranger Standard Cab)
In some early Rangers, the rear speakers were mounted in boxes behind the seats. All things considered, if these speakers are still working at all, it’s a minor miracle.
The problem with replacing them is that there’s a better than good chance of breaking the box. Your best move here is to remove the old boxes and fabricate new boxes, but if you have more creative ideas, please share them in the “Comments” section below.
In later trucks, the speakers (if present) were mounted in enclosures at the rear of the cab. These speakers are a lot easier to reach and replace, and all the specific details can be found in your Crutchfield MasterSheet.
Tools needed: Phillips screwdriver, 11/32" socket and ratchet
Removing the rear speakers (Ranger SuperCab)
The ranger SuperCab debuted in 1986. If yours has rear speakers, they’re not too hard to reach and replace. A nice variety of 5-1/4" or 6"x8" speakers will fit back here, so you’ll have some excellent choices.
Remove the four Phillips screws securing the speaker grille, then remove the grille. Remove the four Phillips screws securing the speaker, then pull it out and set it aside.
Tools needed: Phillips screwdriver

The Bronco II's rear side speakers are easy to remove and replace (Crutchfield Research Photo)
Removing the rear side speaker (Bronco II)
Upgrading the Bronco II’s stereo system involves the same work as the Ranger until it’s time to access the rear speakers — if present. If your Bronco II was not originally equipped with rear side speakers, adding new ones will involve more work than we’d recommend for the average DIY-er.
To remove the old ones, you’ll need to remove the four Phillips screws securing the speaker grille. Set the grille aside, then remove the four Phillips screws securing the speaker. Pull out the old speaker, disconnect it, and remove it.
Read our Car Speakers Buying Guide for more information.
Shop for speakers that fit your Ford Bronco II
More bass in your Ranger or Bronco II
These are compact trucks, and space utilization was still kind of a new science when they were designed. The standard cab offers next to no room for a subwoofer enclosure, while the SuperCab offers a bit more, but not much. If you want to improve your bass performance, we’d suggest a compact powered subwoofer.
Then again, if you’ve come up with something amazingly creative for your Ranger, we’d love to hear about it. Send your info and photos to us and we'll show them off in our Custom Car Showroom.
The Bronco II offers a lot more space, obviously, so you can add a decent-sized subwoofer box. Measure twice, order once. You can also talk to our expert Advisors and get some guidance about what'll work in your truck.
Learn more about building a bass system in our Car Subwoofer Buying Guide.

You can quiet your truck's cabin a bit by installing Dynamat in the doors
Other options for your Ranger or Bronco II
Here are a few other ways Crutchfield can help you make driving your Ranger or Bronco II an even more enjoyable experience.
Protect your carpeting with custom floor liners
Driving any truck eventually leads to doing truck-type things, which can take a toll on the carpeting and the floors. WeatherTech floor mats and liners will help protect your carpets from dirt and damage.
Sound deadening
These trucks aren't exactly Lincoln-esque when it comes to peace and quiet. To minimize road noise and maximize sound, we recommend installing Dynamat inside the door panels.
Navigation
A double-DIN navigation receiver won't fit in the Ranger or Bronco II, but you don't have to be directionless. A portable GPS can mount on your dash and give you turn-by-turn directions, traffic updates, and everything you need to make your drive go smoothly. Plus, when you get where you're going, you can put your GPS in your pocket and use it to find points of interest around town.
A place for your phone
Smart phones were only beginning to be a thing when these trucks were new, so the idea of a place to put your phone was pretty much "In a box, in the bed, with the rest of the stuff you're moving to a new place." We offer a nice selection of phone mounts and chargers that'll be a nice addition to your truck's interior.
Security
Installing a security system isn't easy (security systems rarely are), but it's definitely a good idea if you're worried about someone helping themselves to your stuff and your stereo. Our Crutchfield Advisors can help figure out what you need to get the job done, but we usually recommend taking your car and new gear to a professional installer.
Let's get started!
Ready to shop? Use our vehicle selector to find the gear that will fit your car or truck. If you have questions, give us a shout via phone or email.




Comments (0)
Please share your thoughts below.